Sukhoi T10 Flanker-A
Soviet Flanker prototype from Modelsvit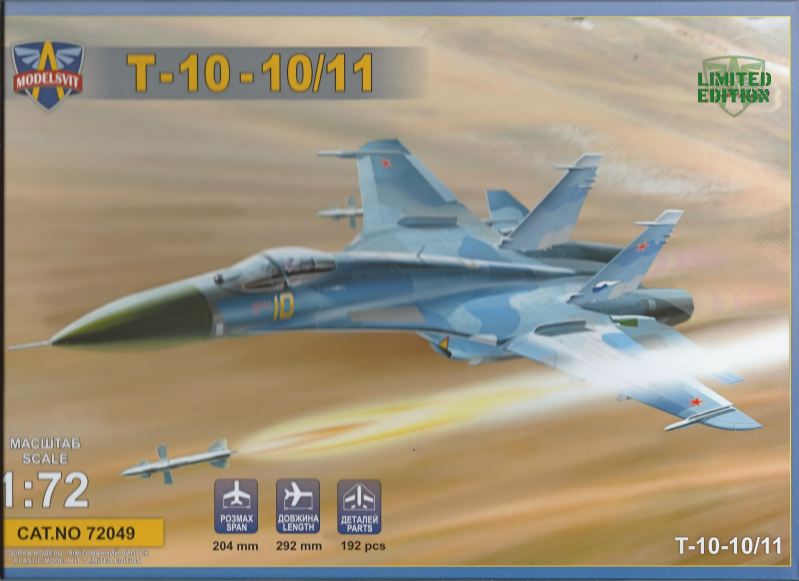
Excellent Modelsvit Box Art
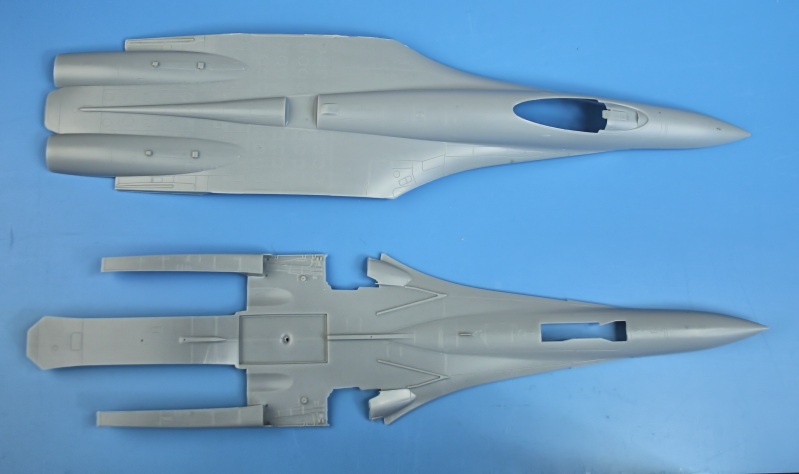
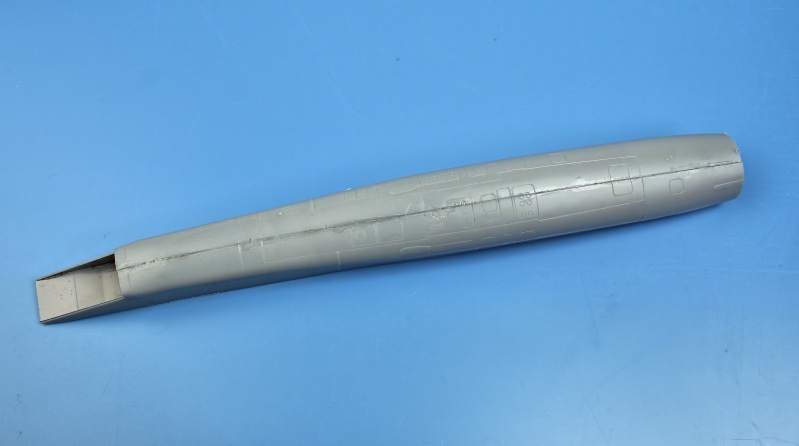
Top and bottom fuselage mouldings.
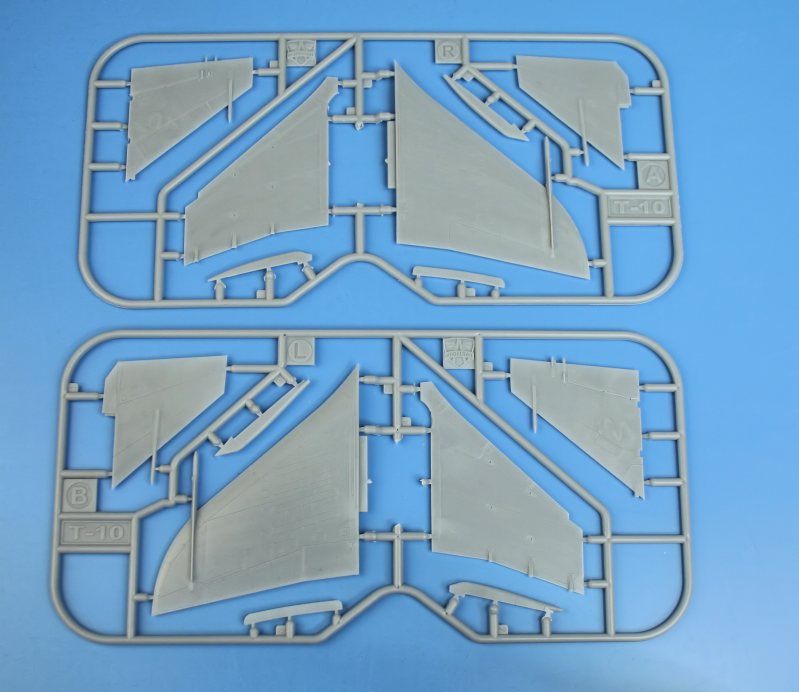
Wings and Fins.
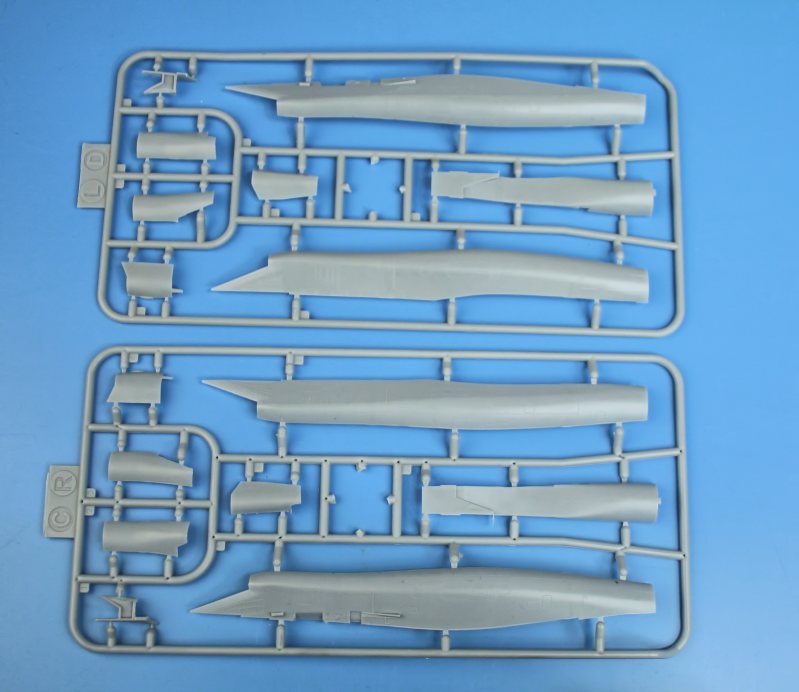
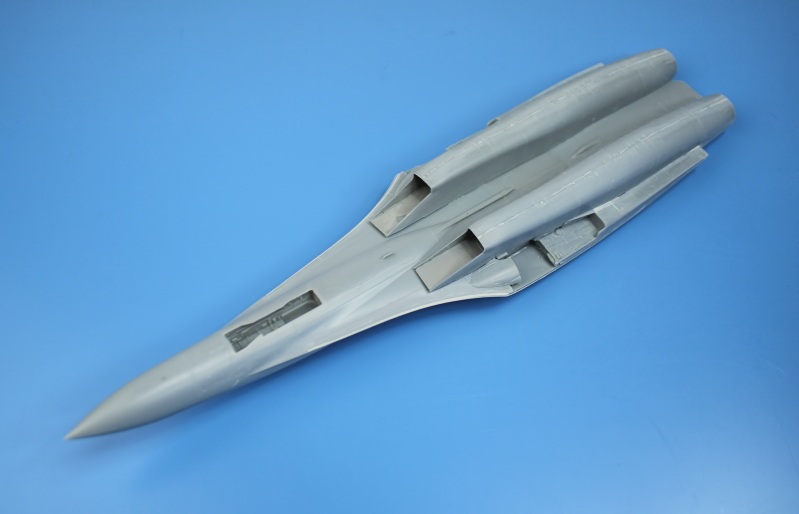
Engine nacelles.

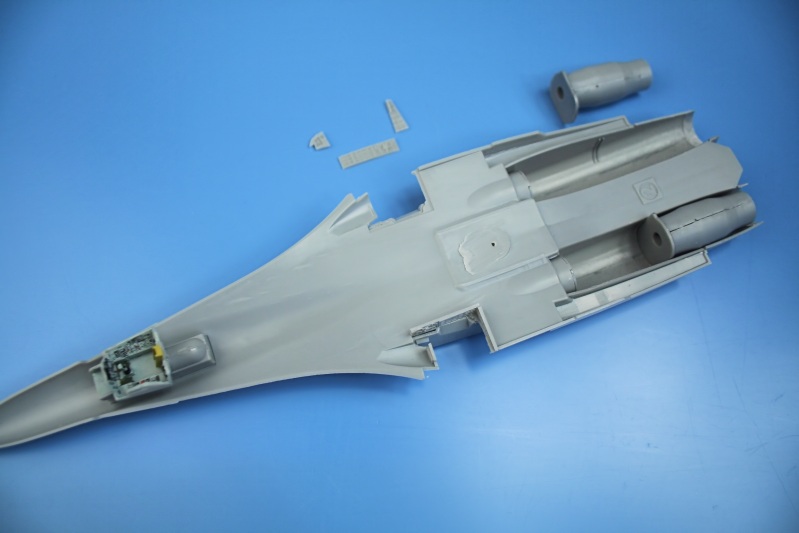
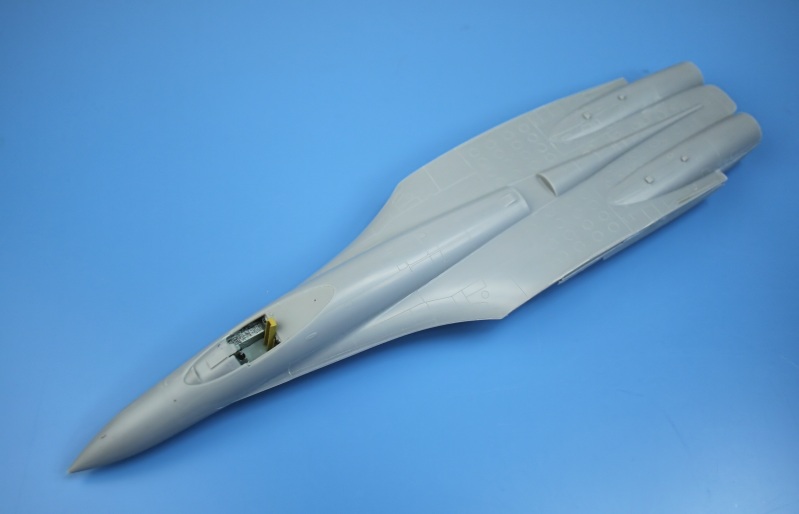
Nose undercarriage, wheel bays and cockpit.
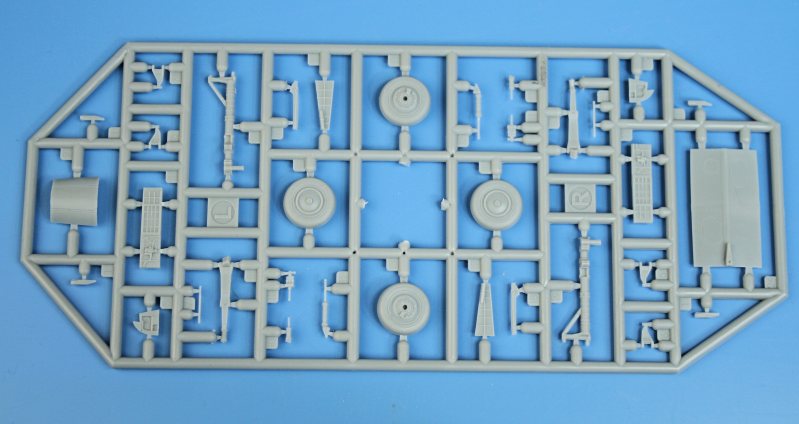
Main undercarriage and wheels.
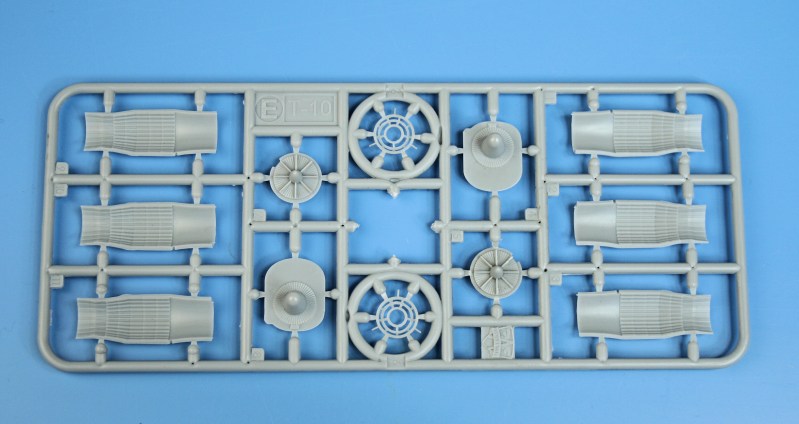
Jetpipes, engine compressor faces and afterburners.
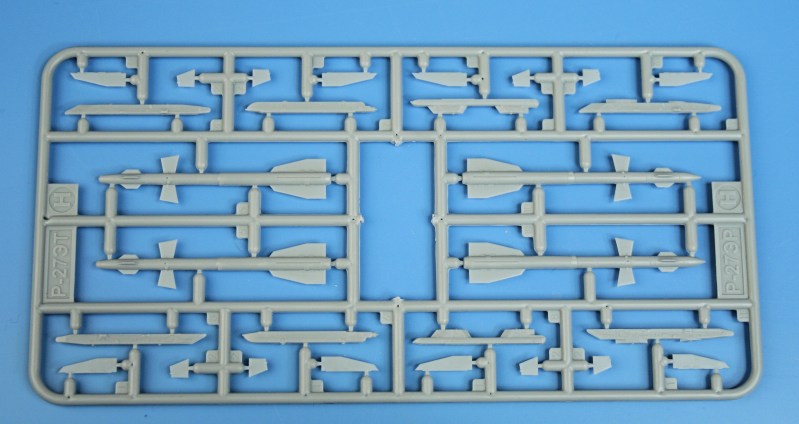
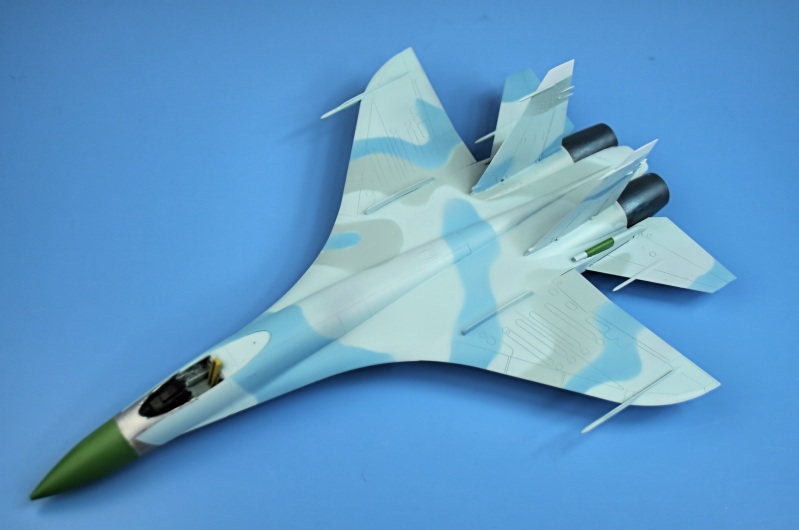
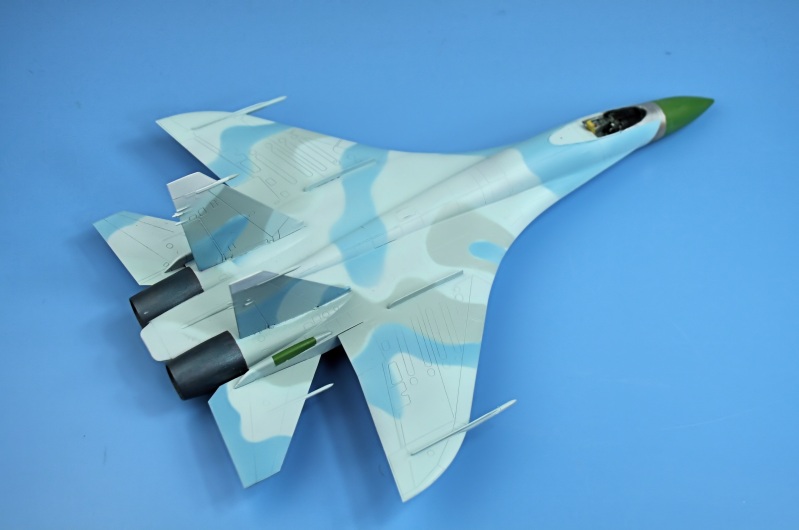
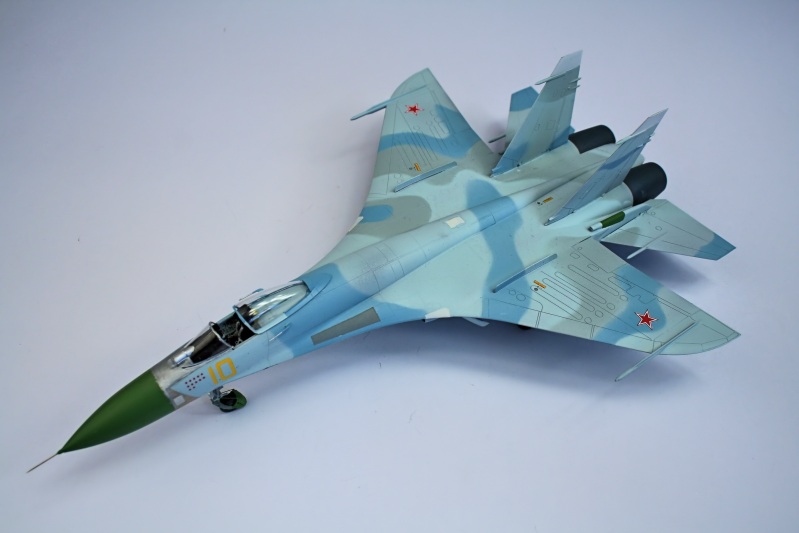
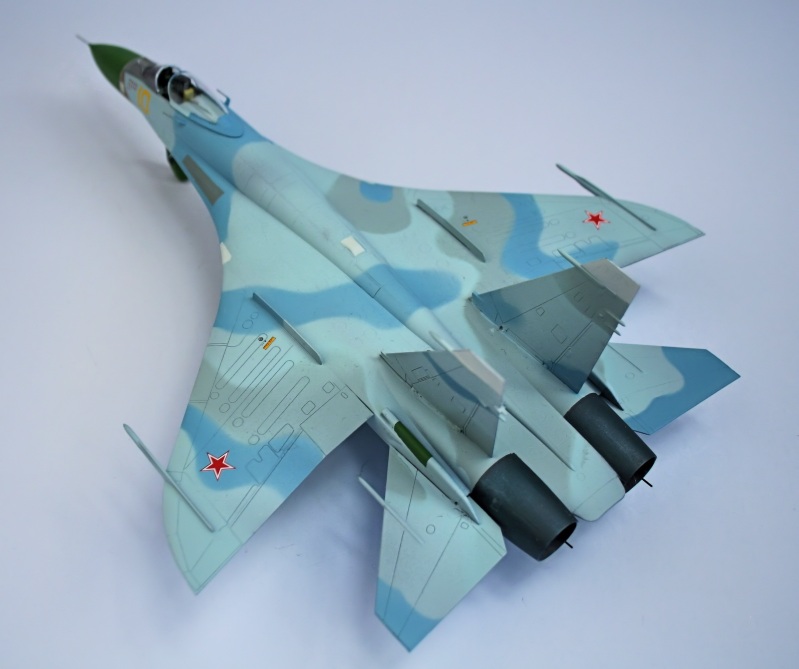
2 X R-27ET and 2 X R-27ER missiles and pylons.
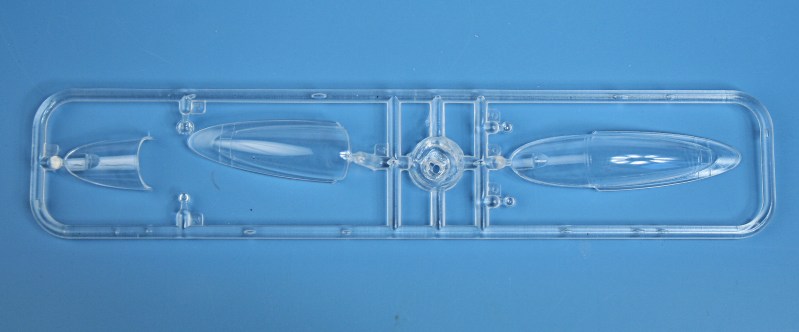
Crystal clear canopies - open or closed.
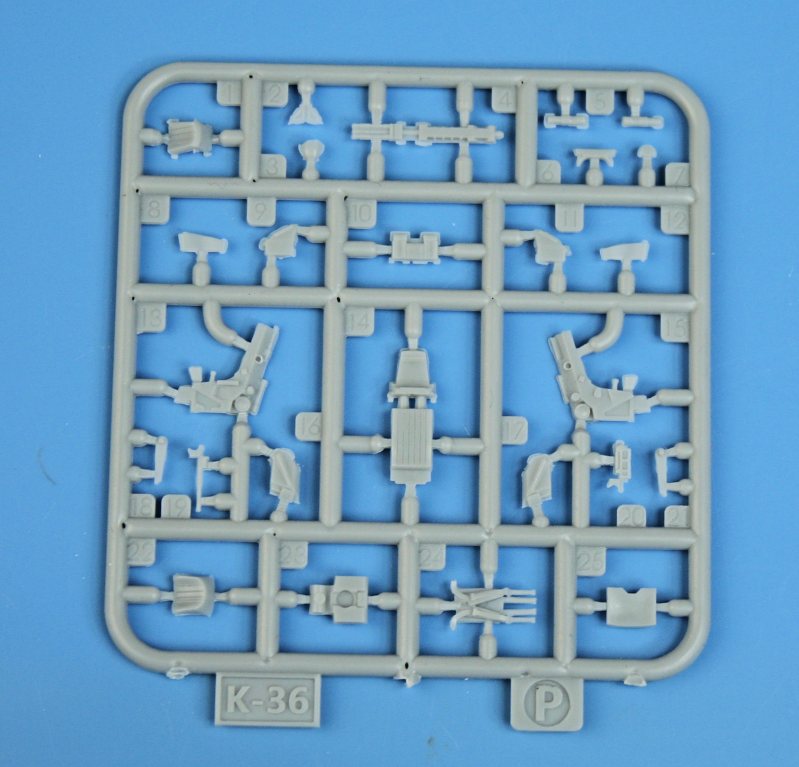
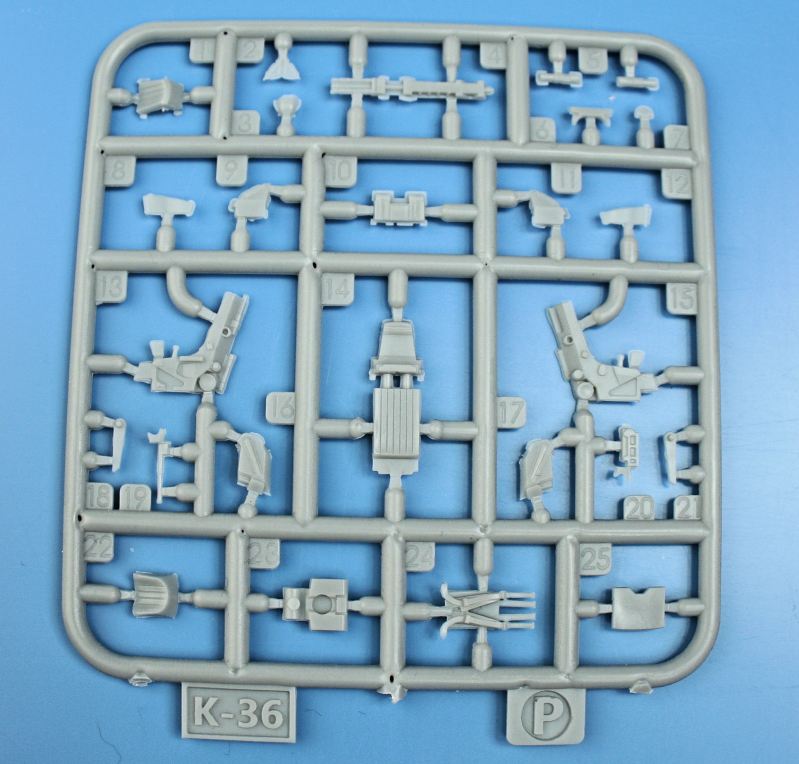
Early K-36 ejection seat - made up from 26 parts!

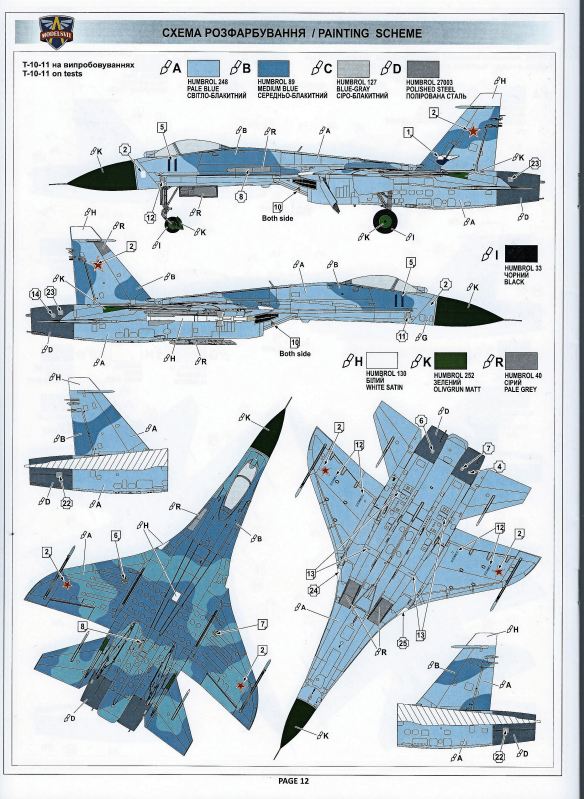
Decal sheet - for bort Yellow 10 and Blue 11 - note the instrument panels.
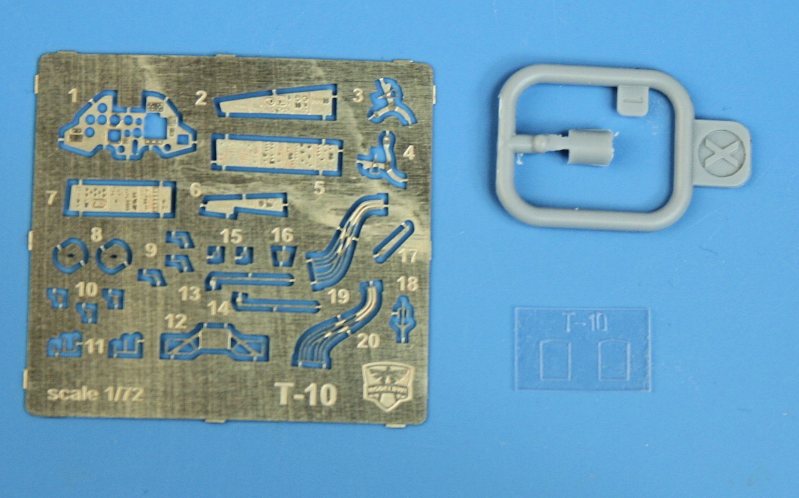
Etched brass parts, IRST ball and clear 'glass' for the etched HUD!
Not shown is the comprehensive sheet of self-adhesive masks - for the wheel hubs and inside and outside of the canopy!
Back page of the 12-page instruction booklet.
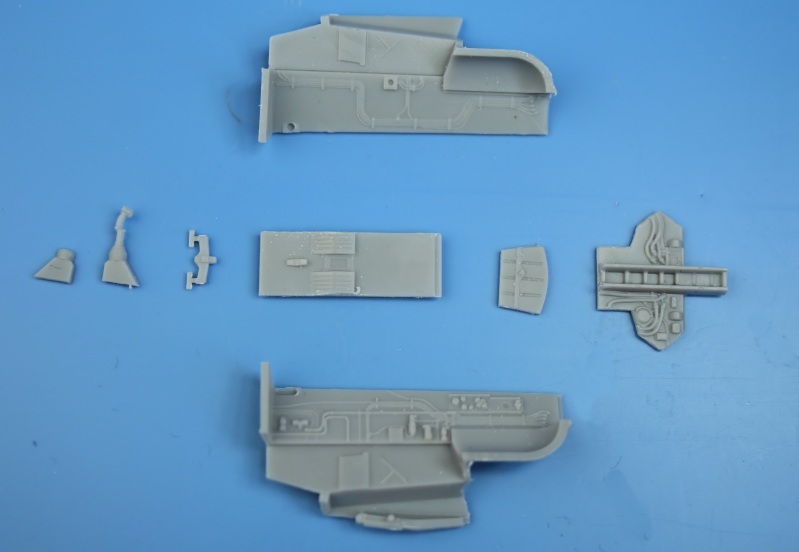
Components of the combined nosewheel bay and cockpit.
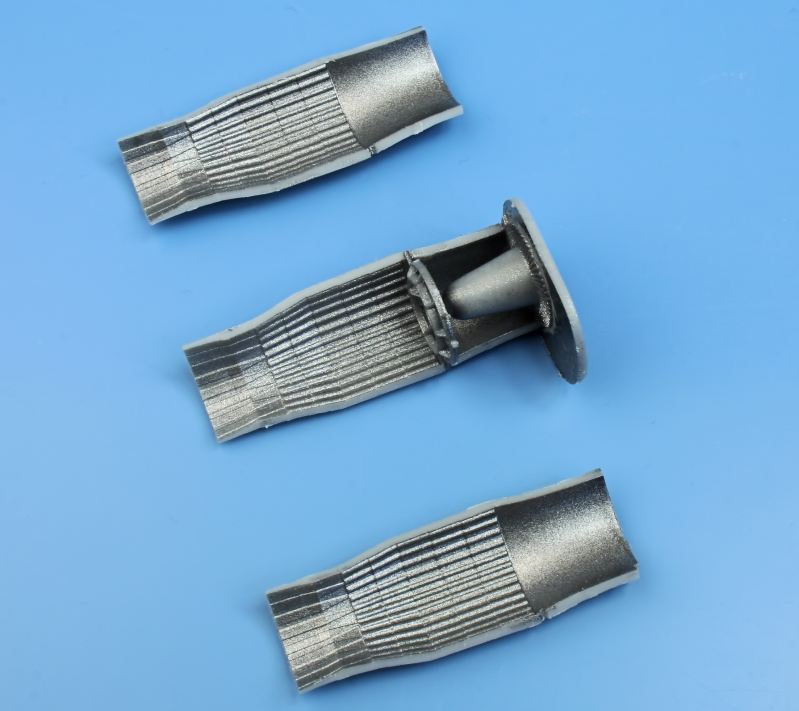
The jetpipes are made up from three segments, a rear turbine face and an afterburner flame holder.....
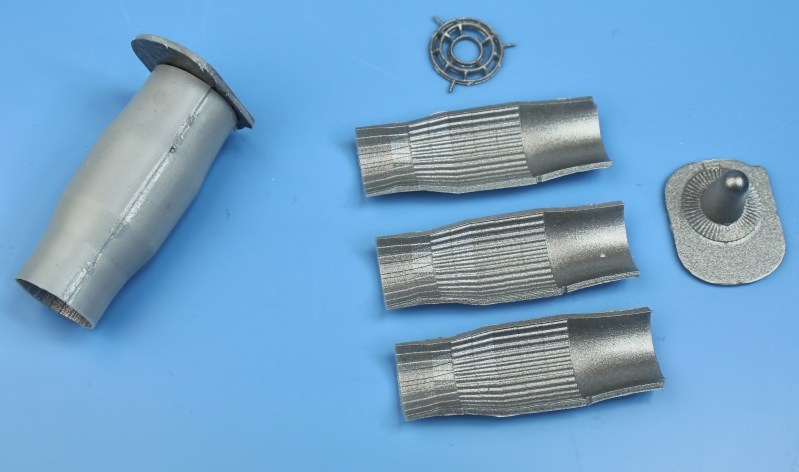
Assembled jetpip at left, parts on the right.

Parts for the fully detailed intakes........
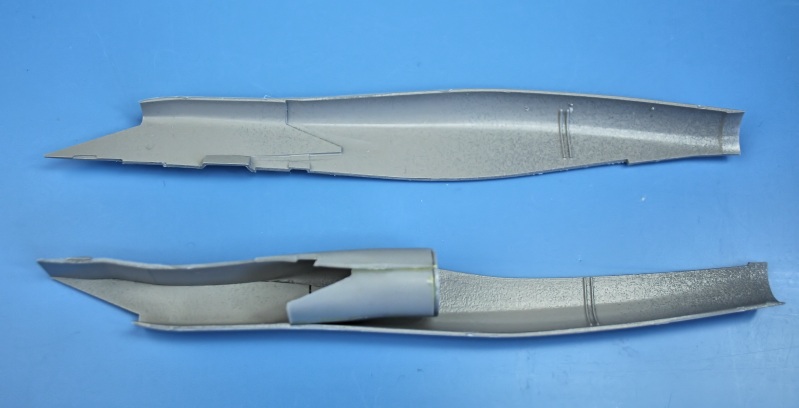
.....partly assembled.........
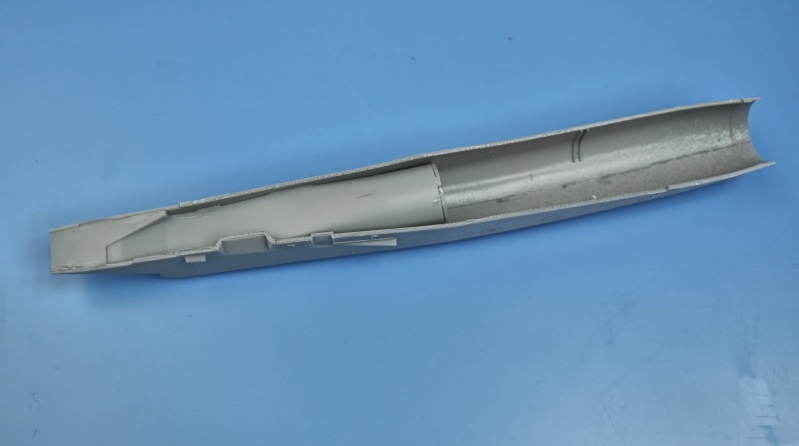
Fully assembled - (the jetpipe assembly is dropped in later).
The complex shape of the intake/engine nacelle.
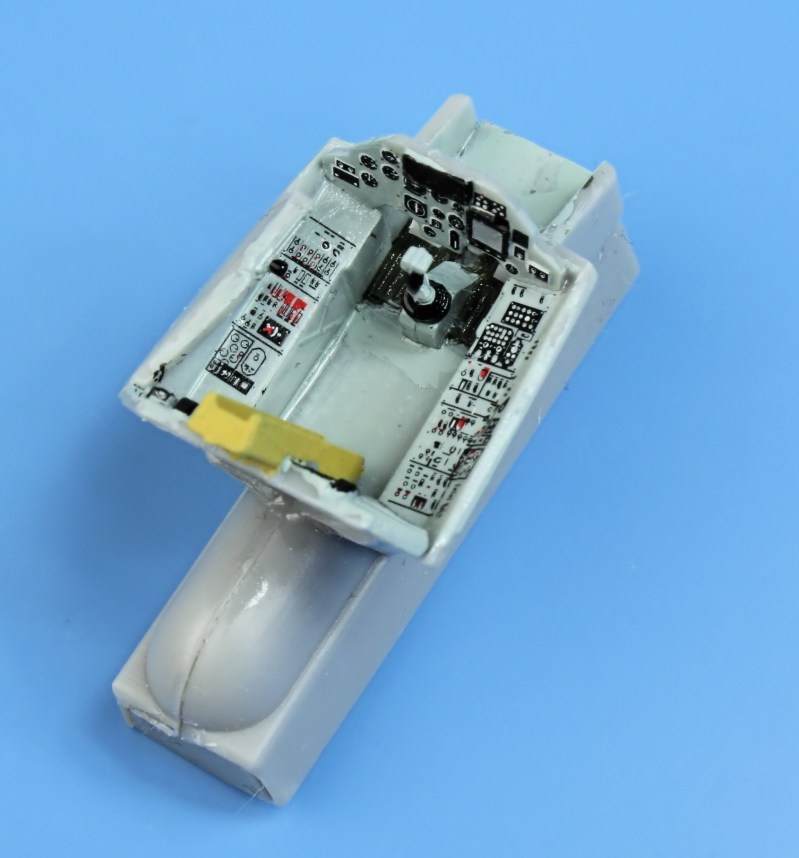
Even without the superb 26-part K-36 ejection seat in place, the cockpit detail is stunning.
I used the kit decals for the instrument panels (totally acceptable in this scale)......
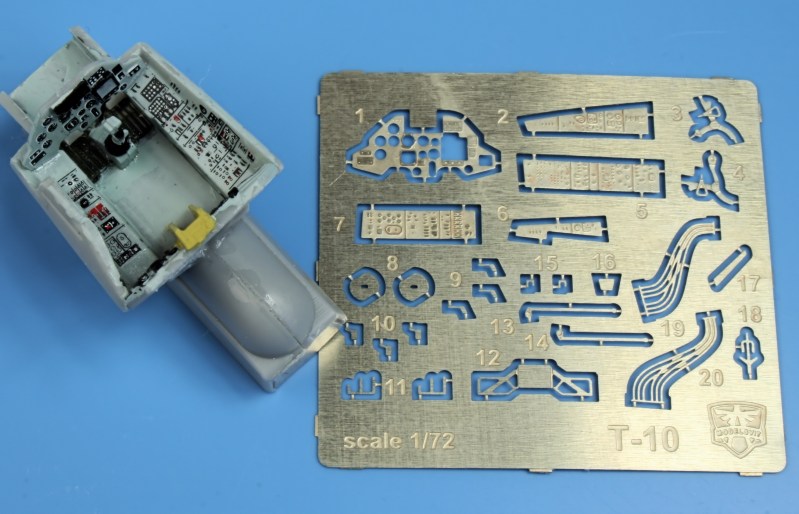
...... although for the super-detailer, alternate etched brass panels are provided.
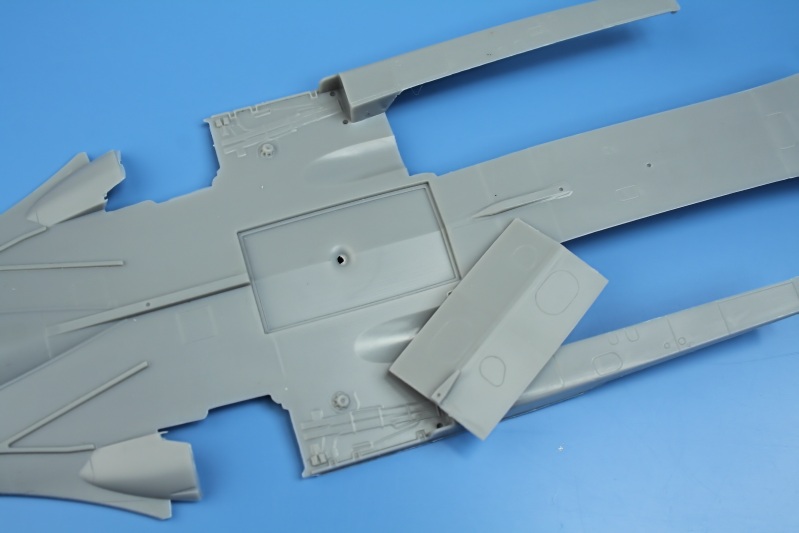
The Flanker has a distinct shallow-vee shaped lower fuselage section - correctly captured by means of a rectangular insert.....
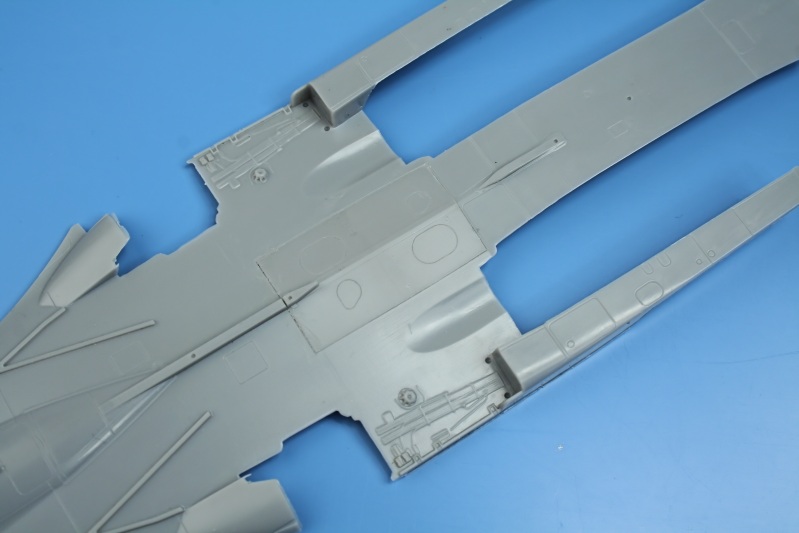
Very few Flanker kits get this area correct - so well done Modelsvit!!
Note the raised detail in the wheel bays and engraved panel detail - this is a quality kit.
The cockpit/nosewheel bay sub-assembly and port side rear exhaust is in place - with the stbd one still to be added.
The main wheel bays are built up from three vertical 'walls'
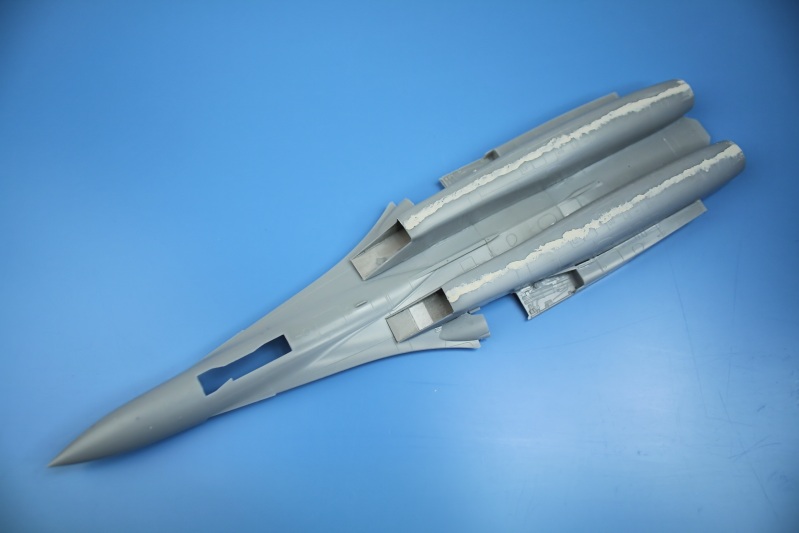
The complex contours of the engine nacelles fit perfectly onto the lower fuselage.
A smear of filler is needed on the lower joint line (overdone in my case).
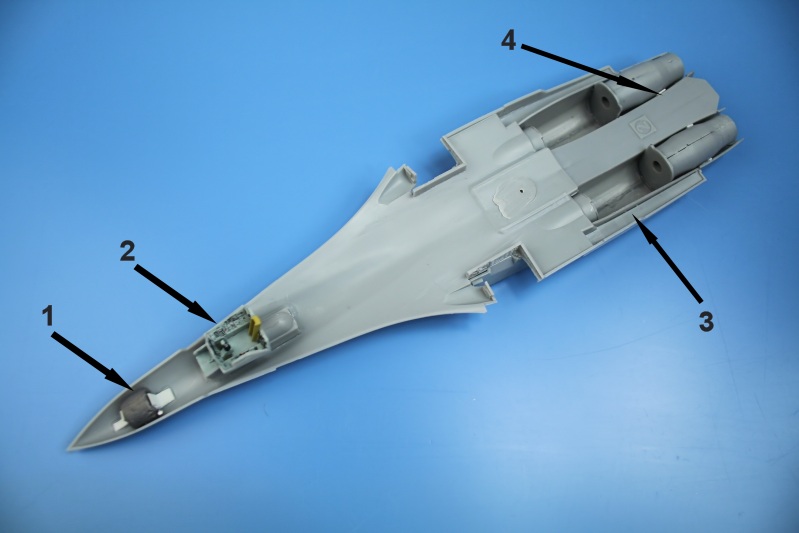
1. First time I have ever added noseweight to a Flanker kit - Modelsvit recommend 2g.
2. Make sure the cockpit sub-assembly is seated well down - or it will foul the upper fuselage.
3. Do not glue these side booms in place until after the upper fuselage is in place.
4. Plastic tabs added to make sure the jetpipe sits centrally in the rear nacelle.
Top and bottom fuselage halves joined. A bit of trimming was needed - but it all went together quite well.
Underside view.
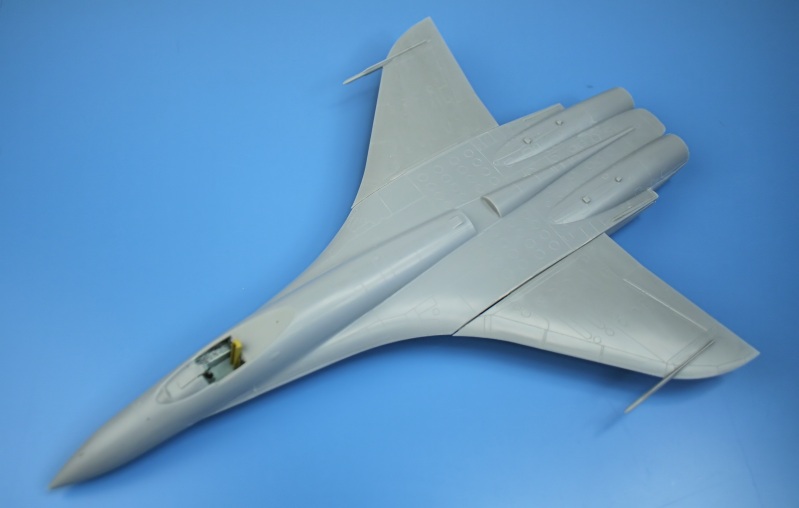
Wings temporarily attached - just to see what it looks like.
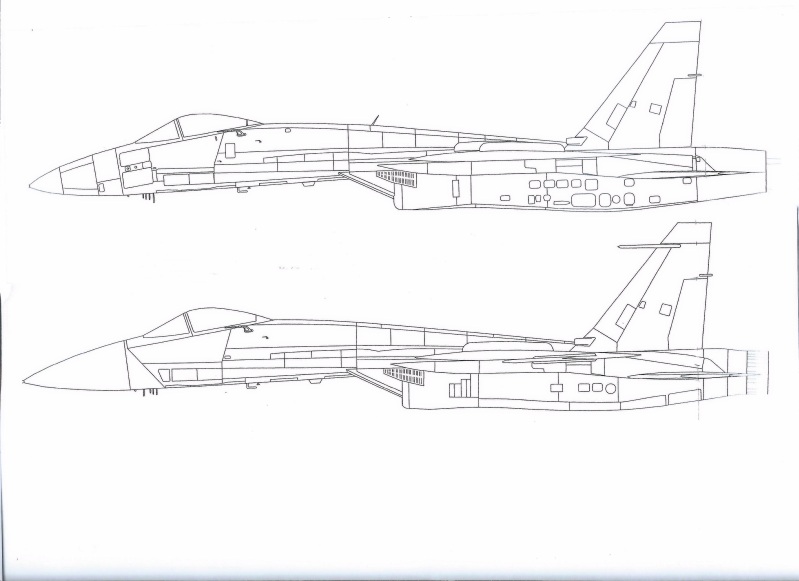
A couple of drawing showing the differences between the first T10-1 and later T10 prototypes (in this case the T10-5).
Note the longer radome on the T10-5. It also has canted fins unlike the vertical fins on the T10-1.
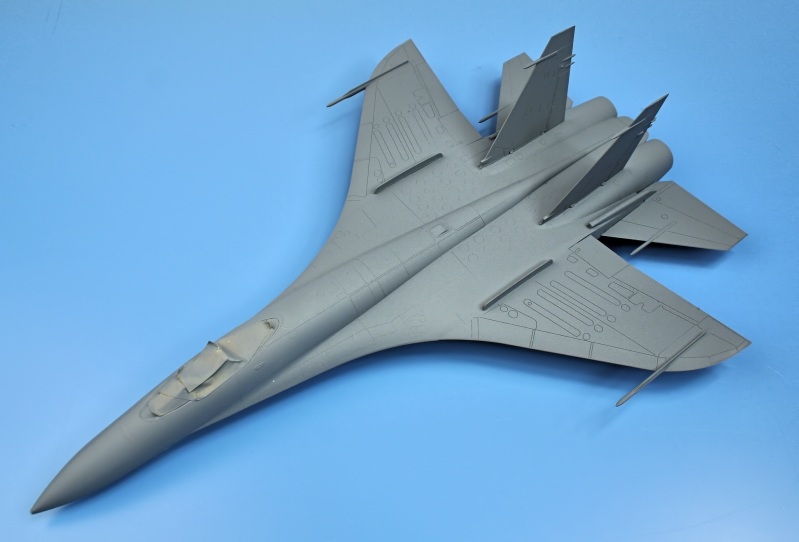
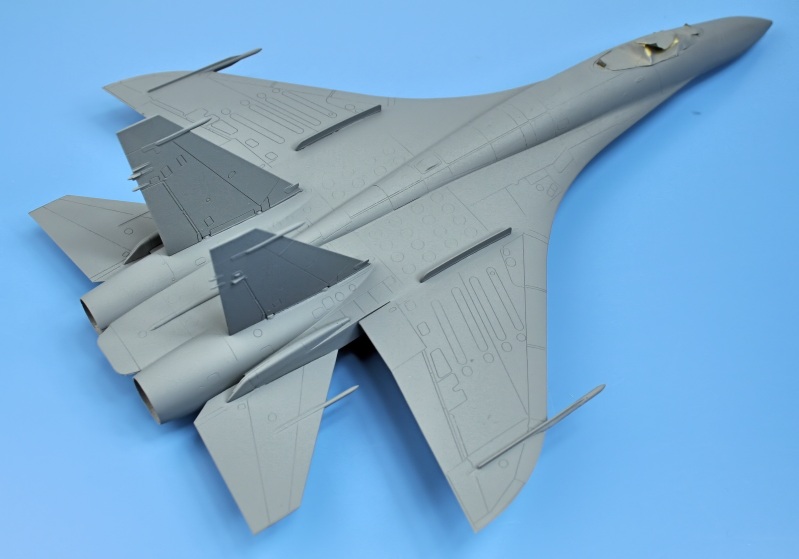
In a coat of grey primer.
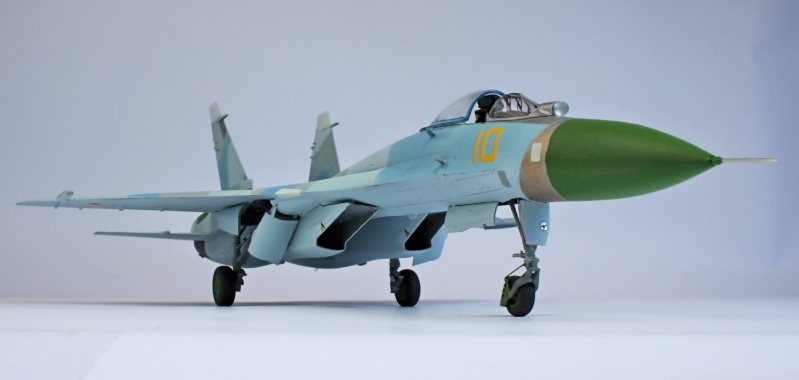
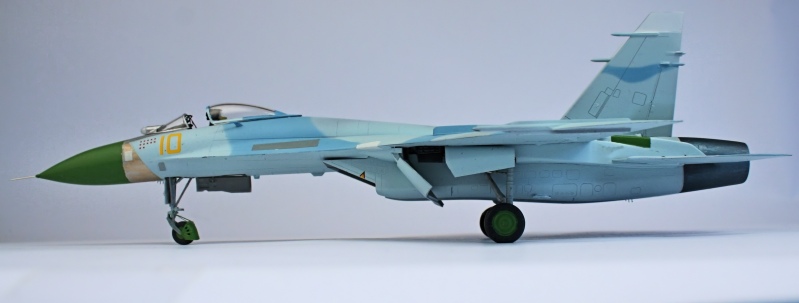
Very different to the re-designed T10S Flanker.
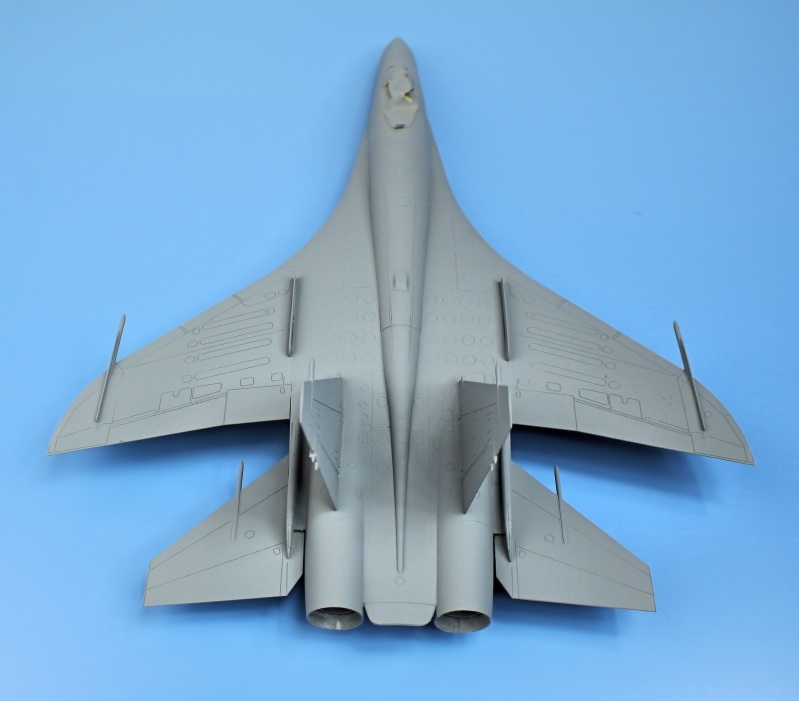
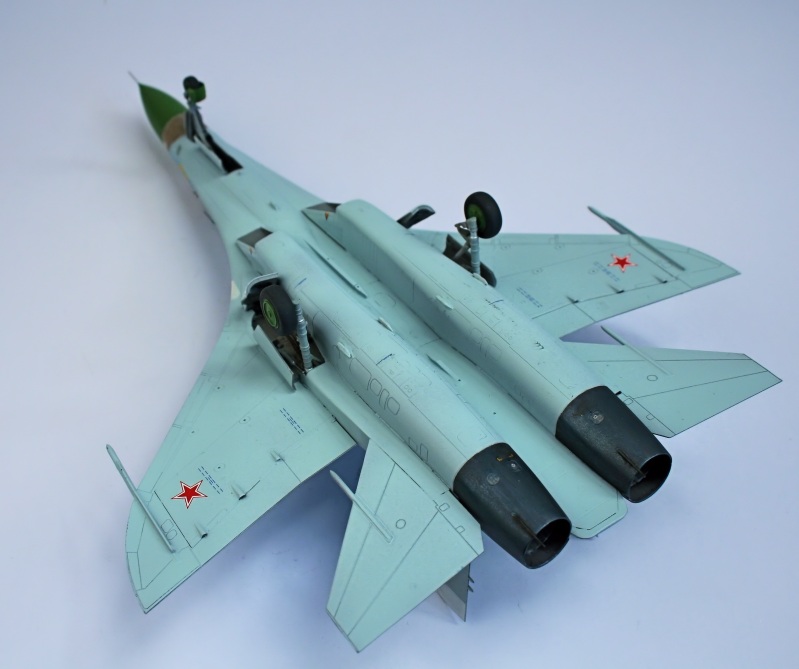
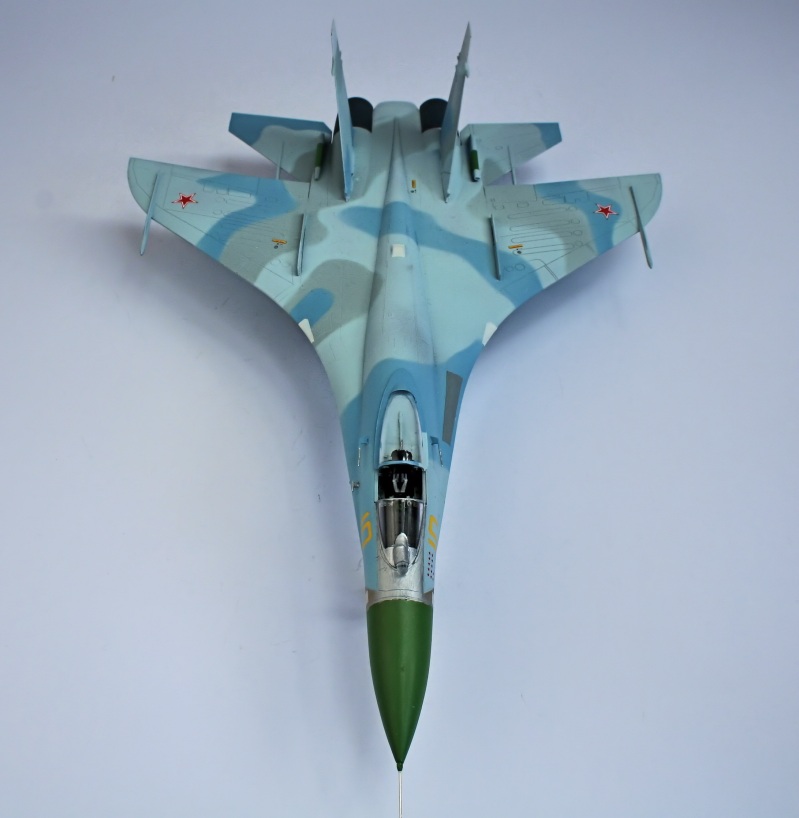
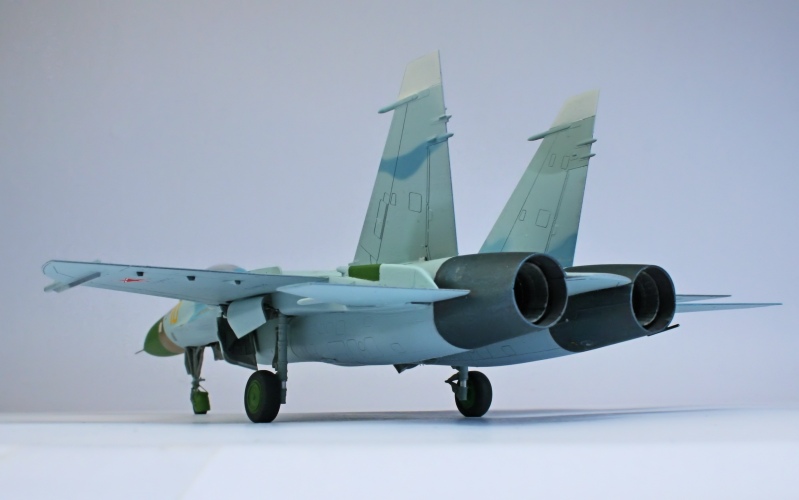
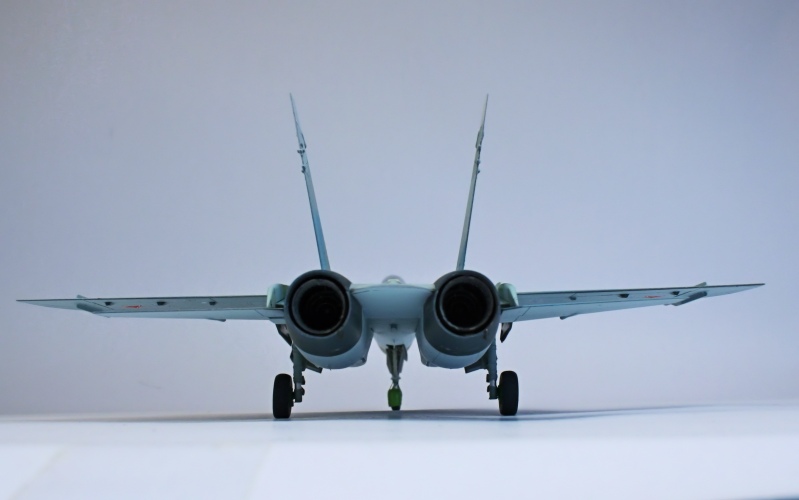
Note the excellent panel detail.
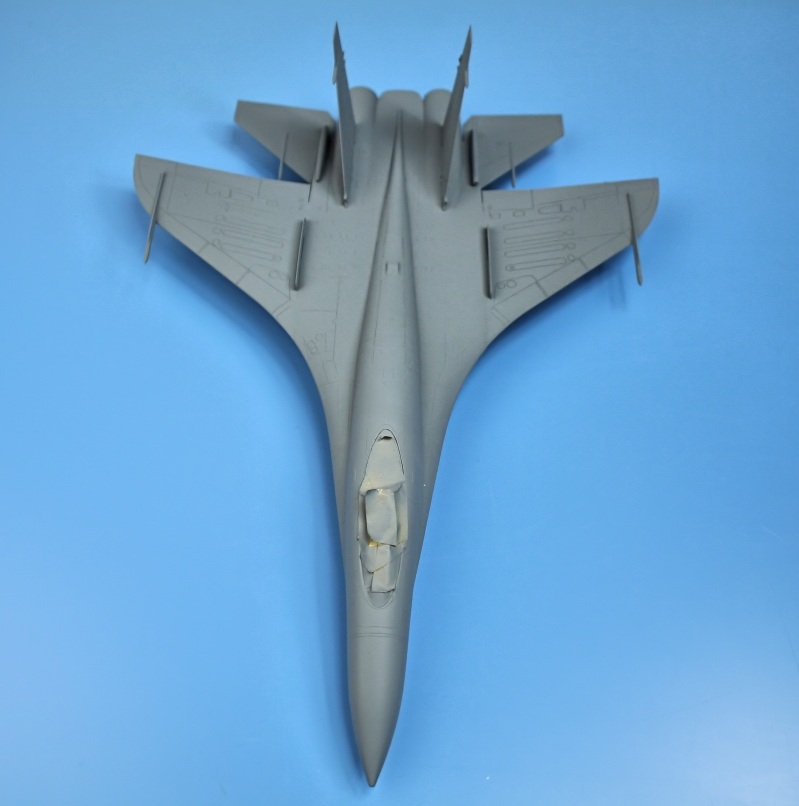
Anti-flutter weights on all flying surfaces - and wing fences.
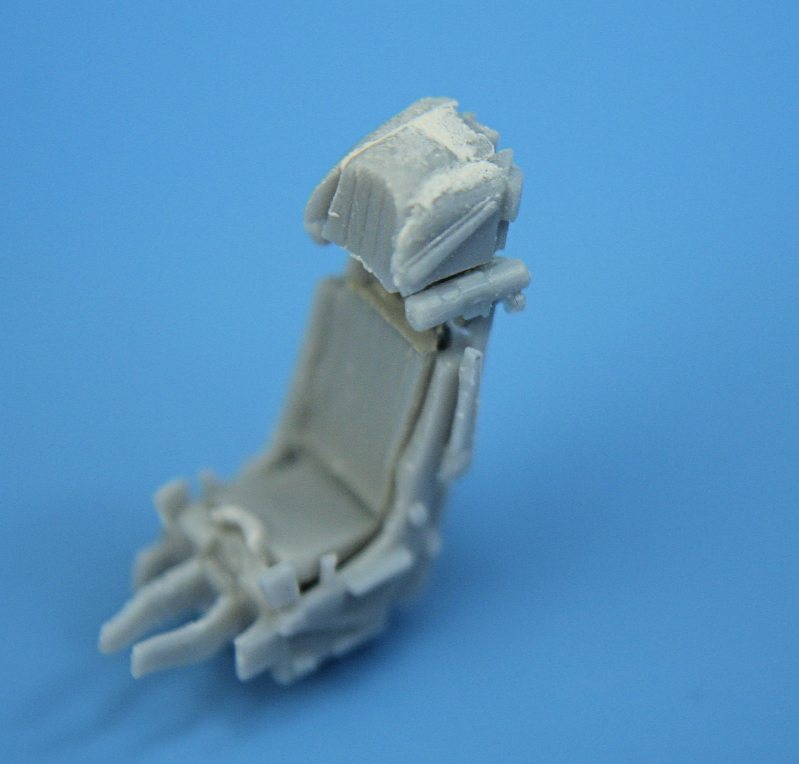
Time to assemble the 26 part K-36 ejection seat..... Note that there are two styles of head box - early small and later large.
You can see them both at top left and bottom left - they each have different side panels. #
Note the seat firing handle...Number 2. Tiny and totally flashed over.
I didn't read the instructions properly - and used the wrong one at first - hence the putty to fill the gaps!
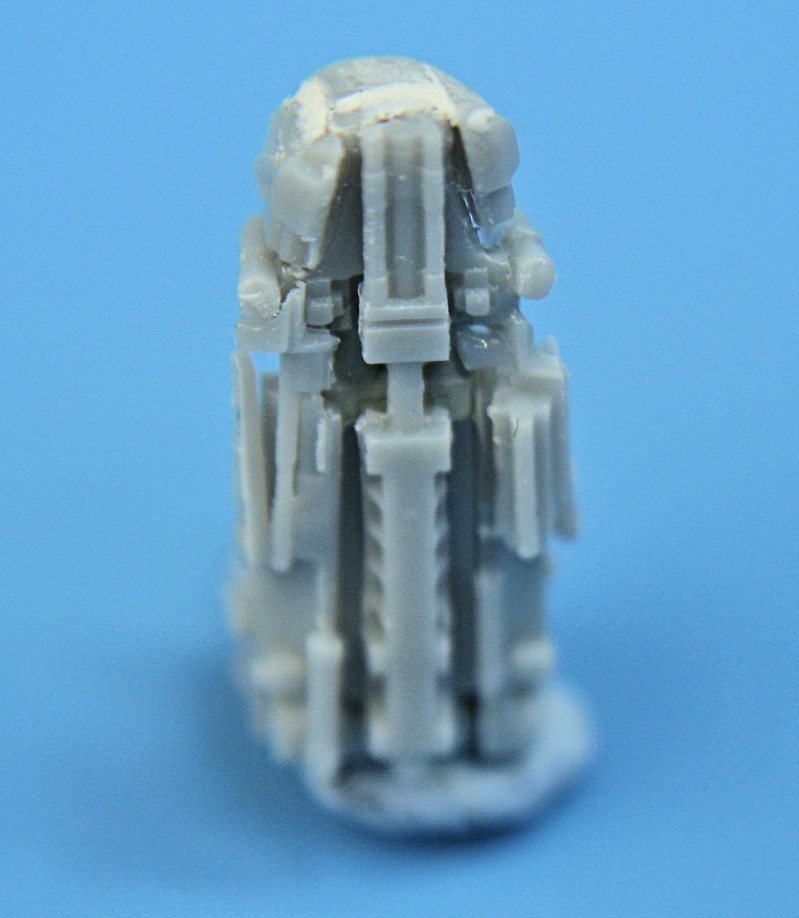
Amazing detail on the back of the seat - which my camera can't do justice to.
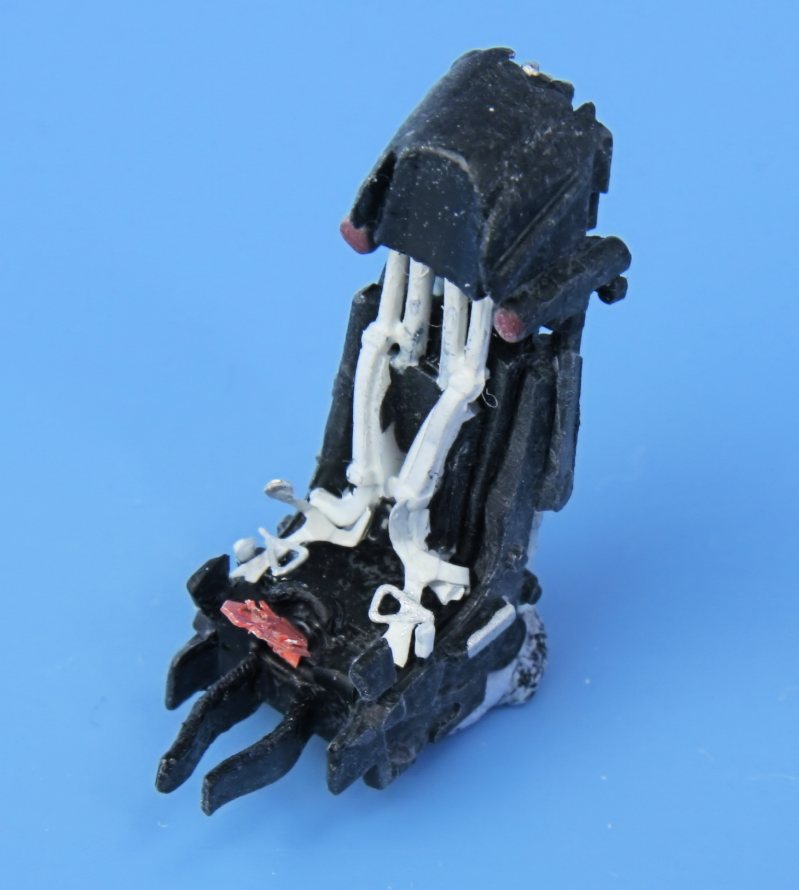
Finished seat painted up - it looks better in real life... honest!
I had to scratch the firing handle from foil - having ruined the plastic part trying to trim off the flash.
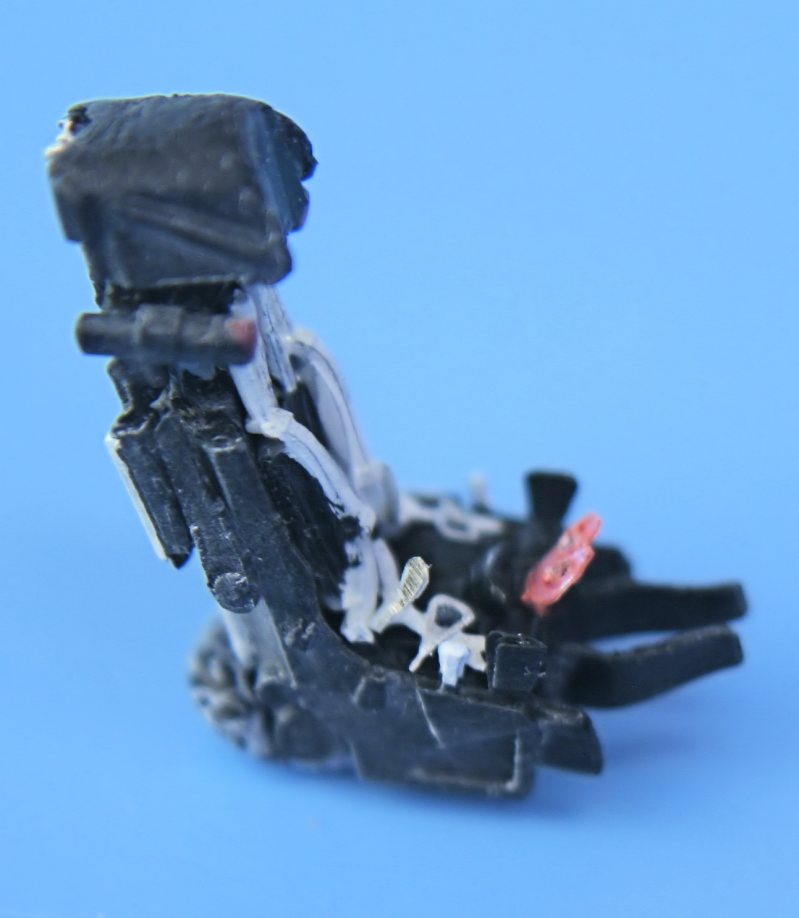
Another (badly taken) shot of the ejection seat.
Fresh from the paintshop.
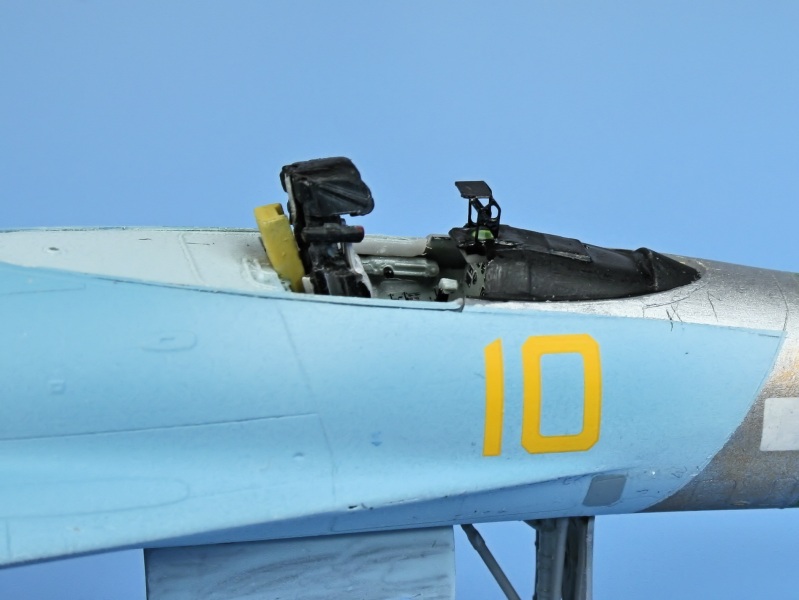
Modelsvit even include an etched-brass HUD.......
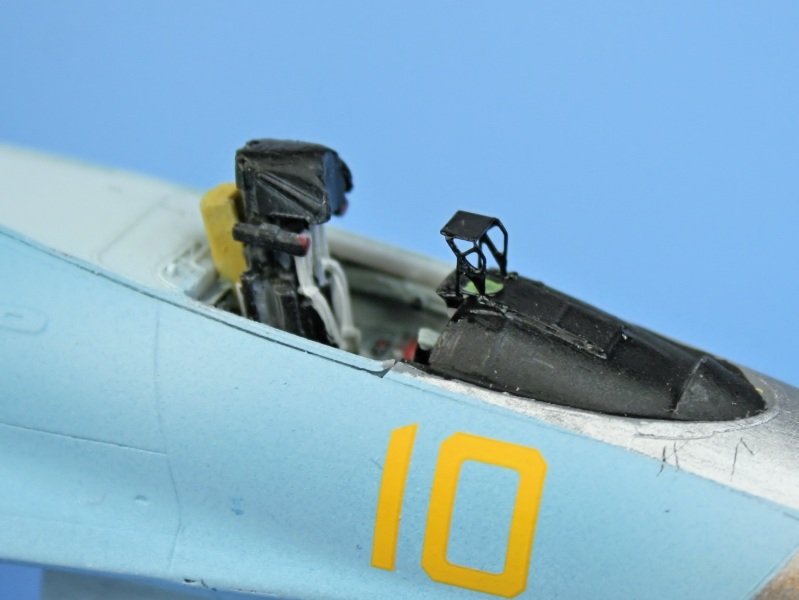
.... they also include the Combiner Glass as a perspex insert!!! (although I bottled out of using it)
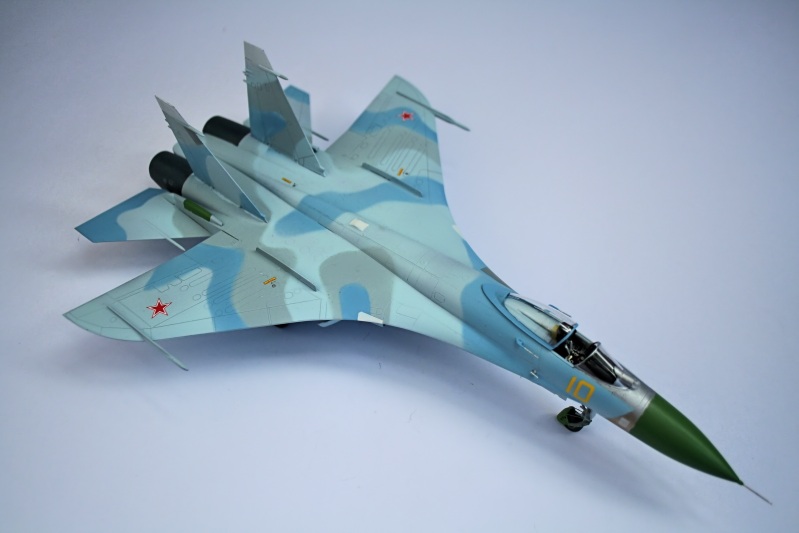
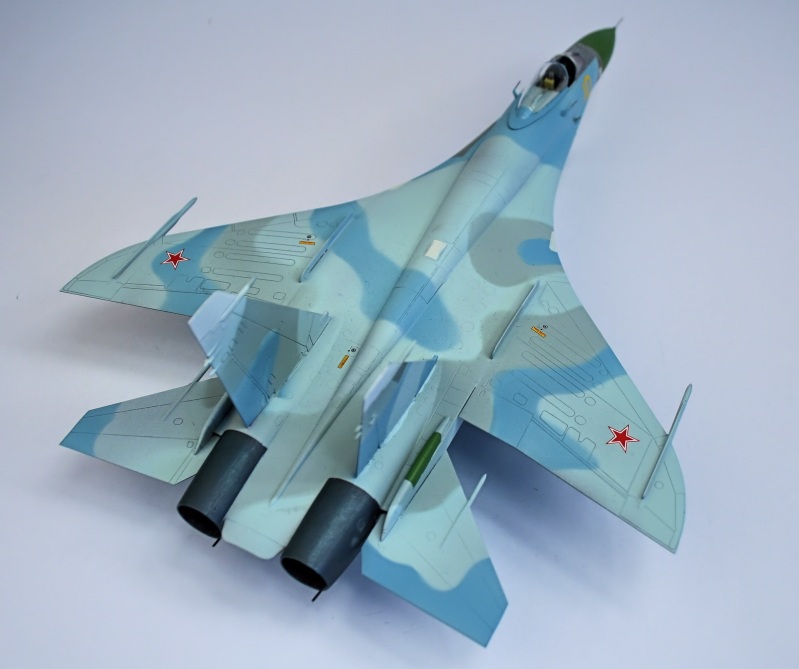
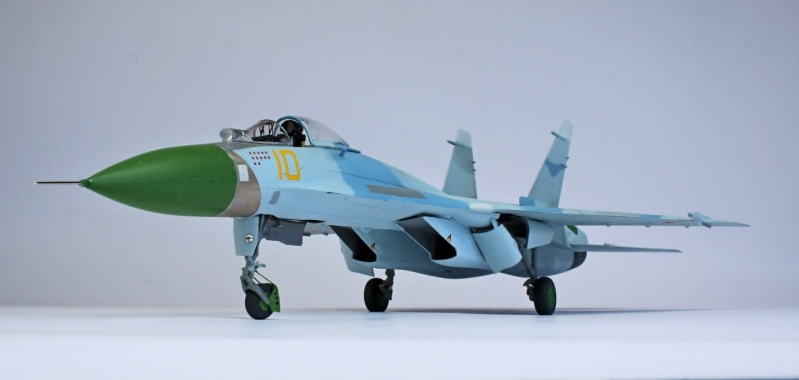
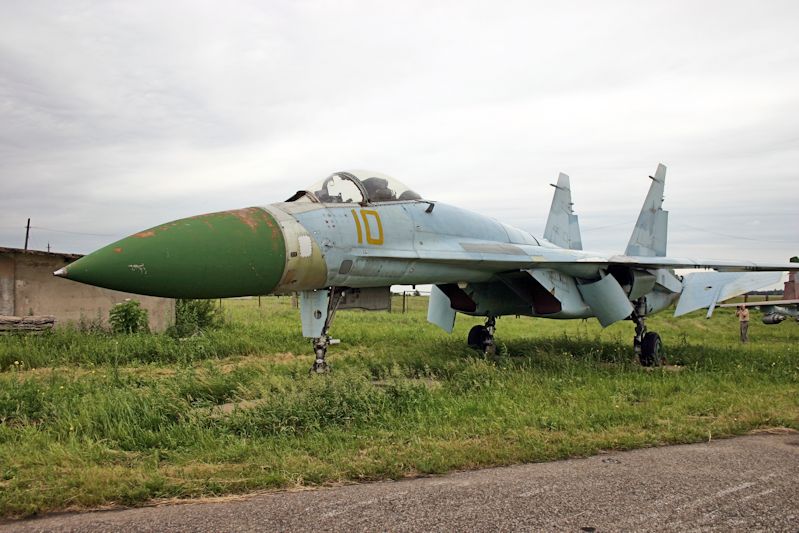
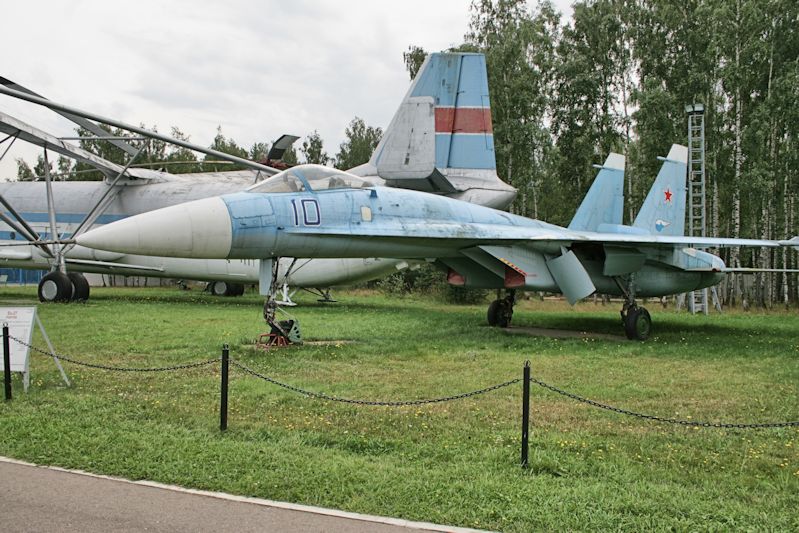
Finished T10....
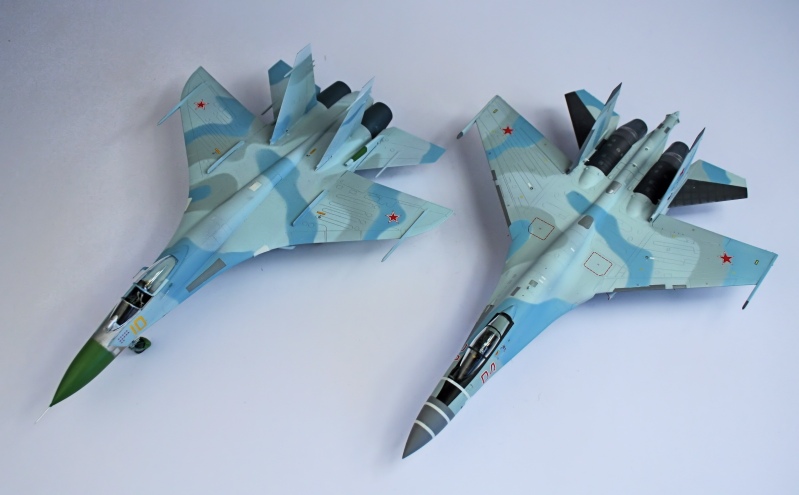
Spot the difference - first and latest Flanker - T10-10 and Su-35S
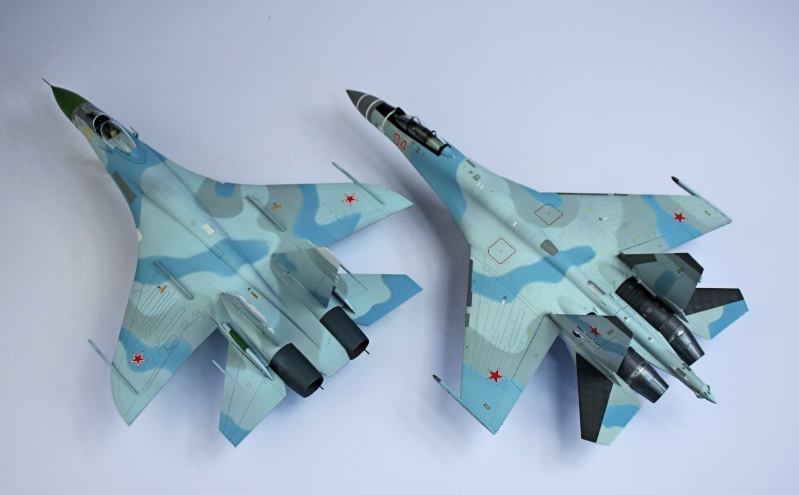
The Su-35S shows the complete re-design from the original T10 to the T10S (Su-27).
Walkround Photos
All photos are Copyright Ken Duffey
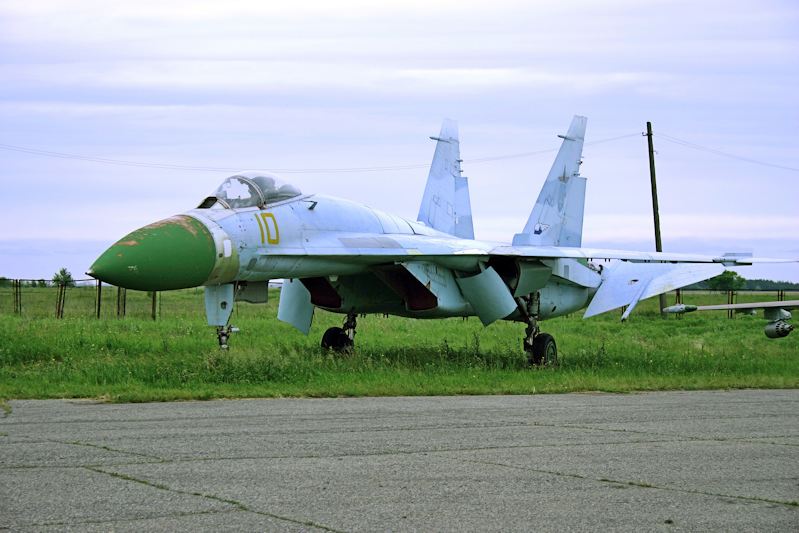
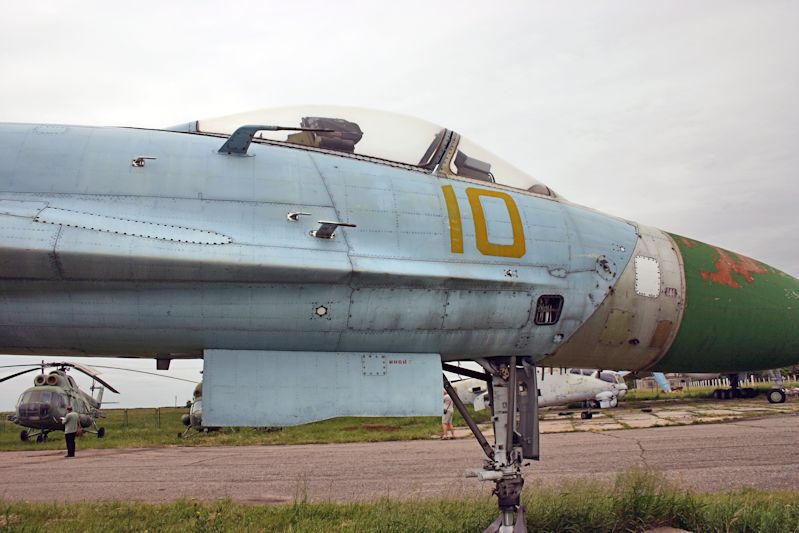
The real T10-10 - taken at Lugansk 2006
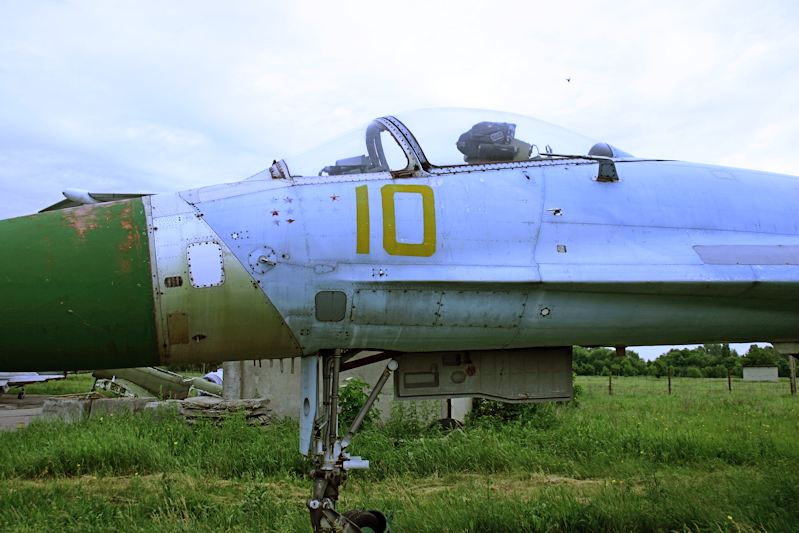
Cockpit and front fuselage - note the aft-retracting nosewheel and sliding canopy.
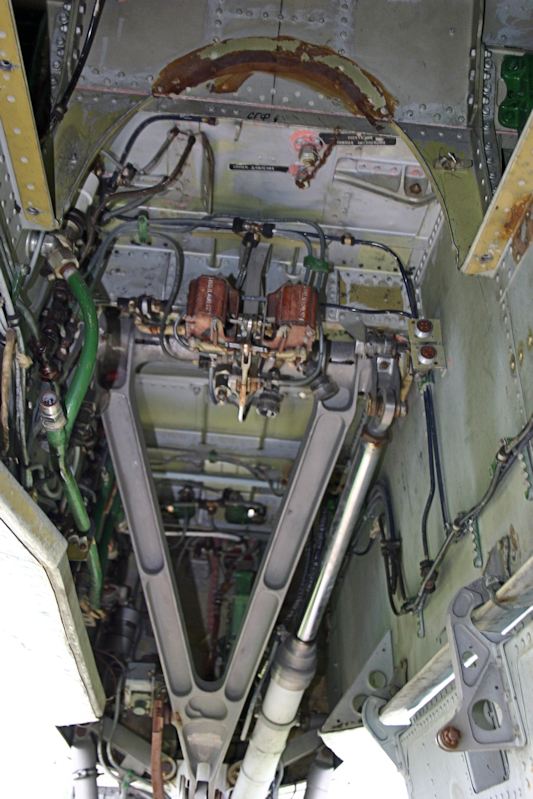
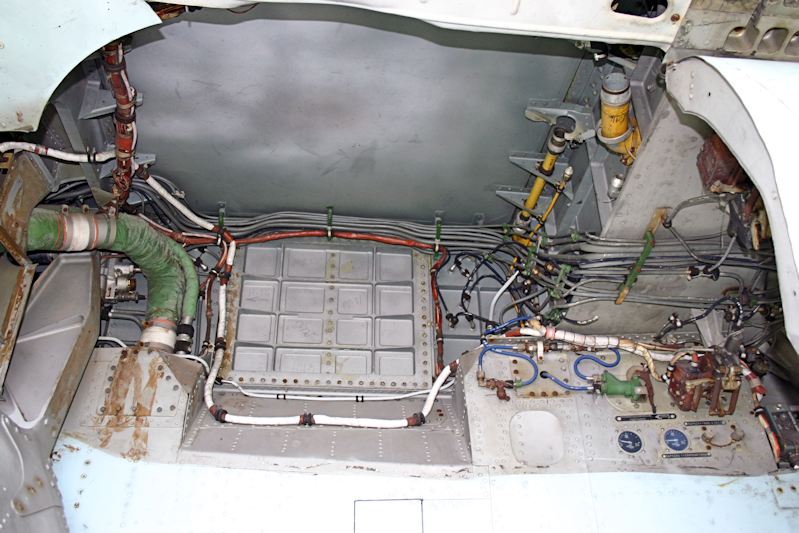
Inside the nosewheel bay.
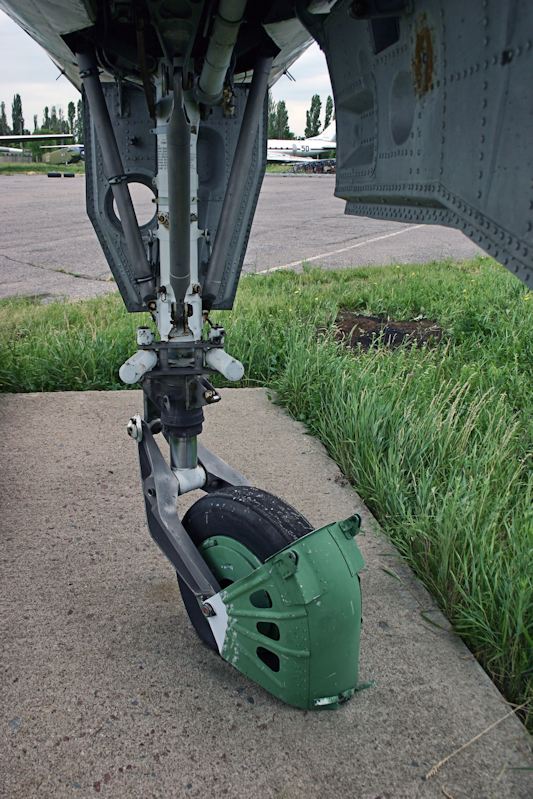
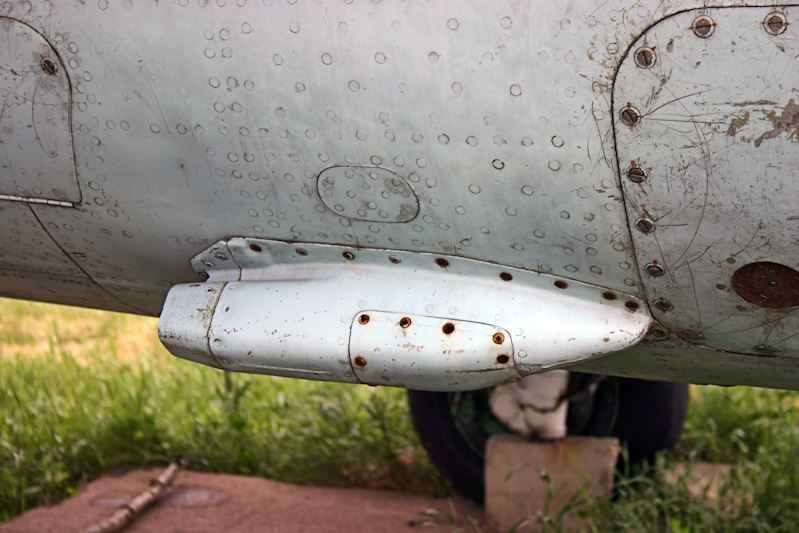
Nosewheel with mudguard - note the missing links to the mudguard and missing landing light in the front door.
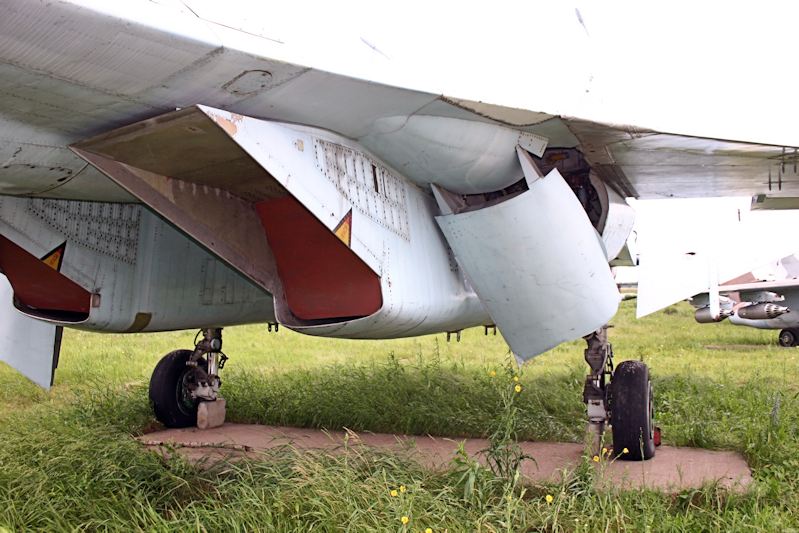
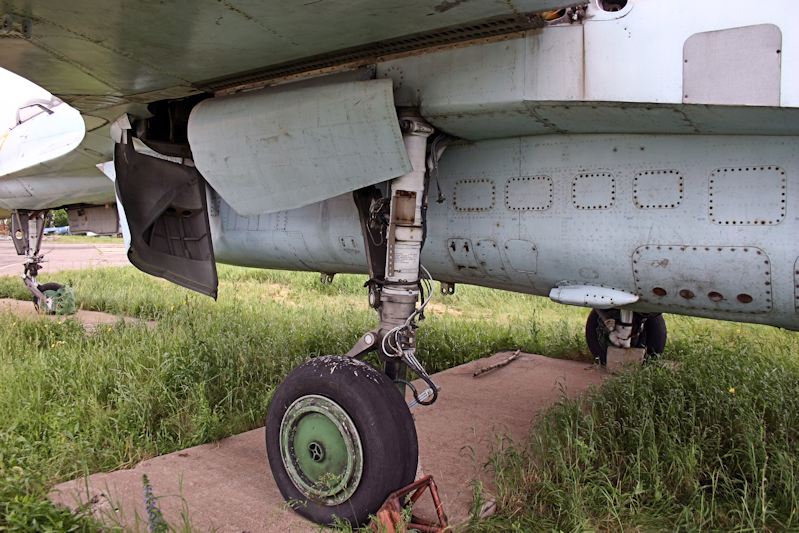
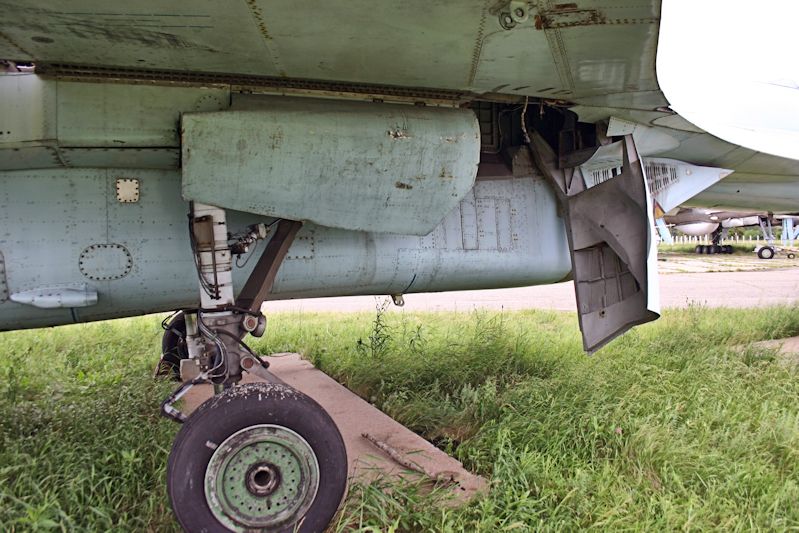
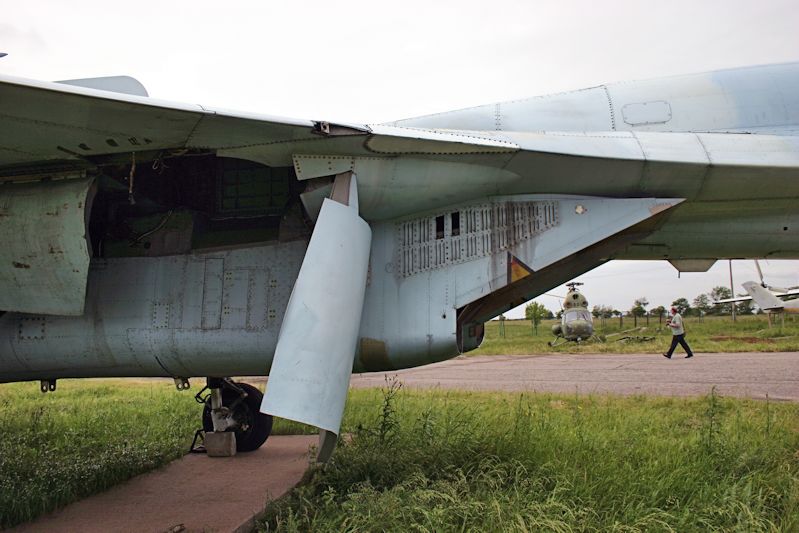
Port intake and front mainwheel door - used as an airbrake.
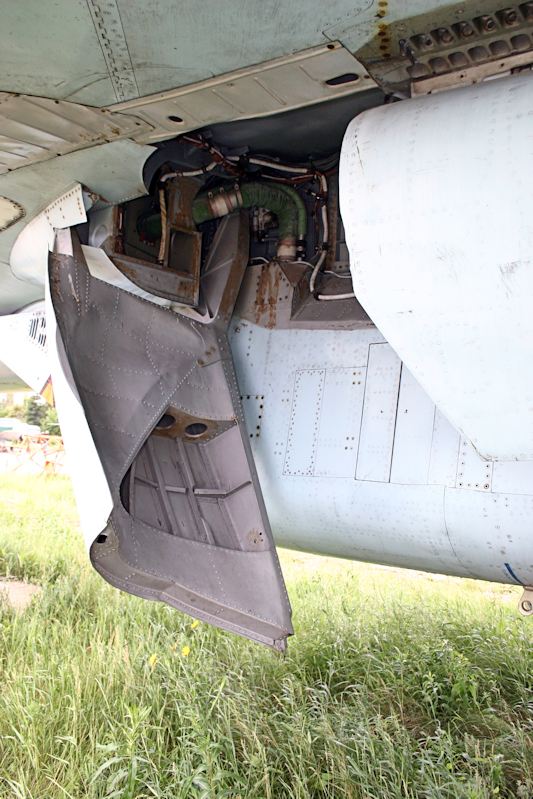
Looking up into the front of the mainwheel bay...
The mainwheel bay...
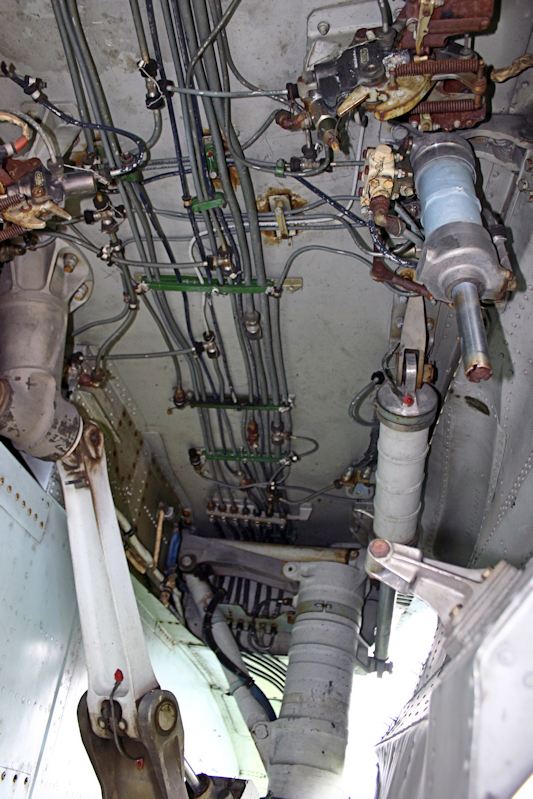
The rear of the mainwheel bay..
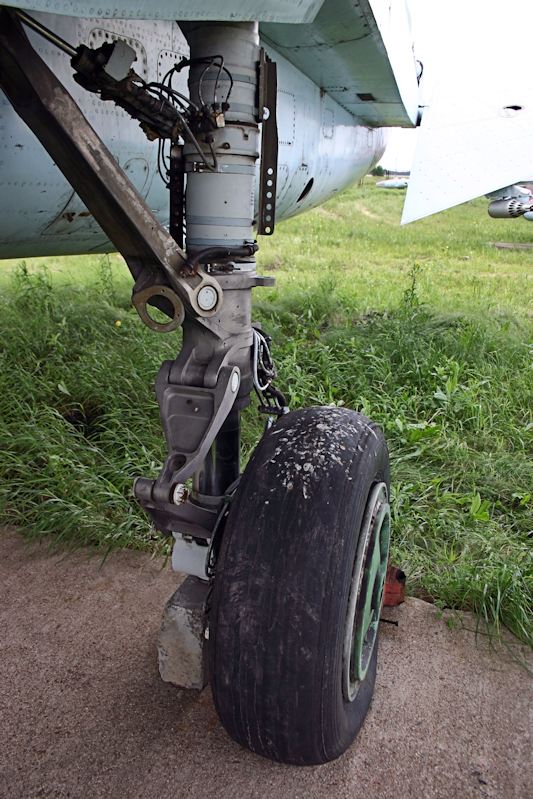
Port mainwheel.
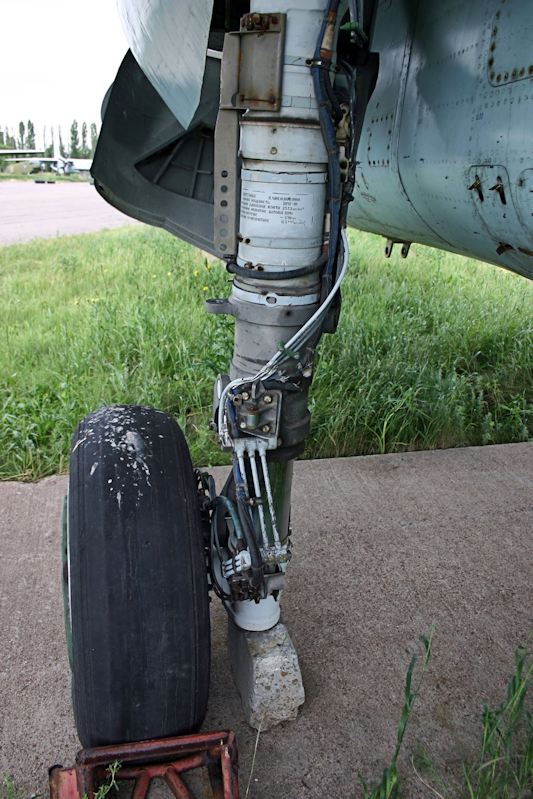
Rear view of the port mainwheel.
Intake.
Port side of mainwheel area.
Port side stabiliser actuator - with missing cover.
Port side stabiliser with anti-flutter weight.
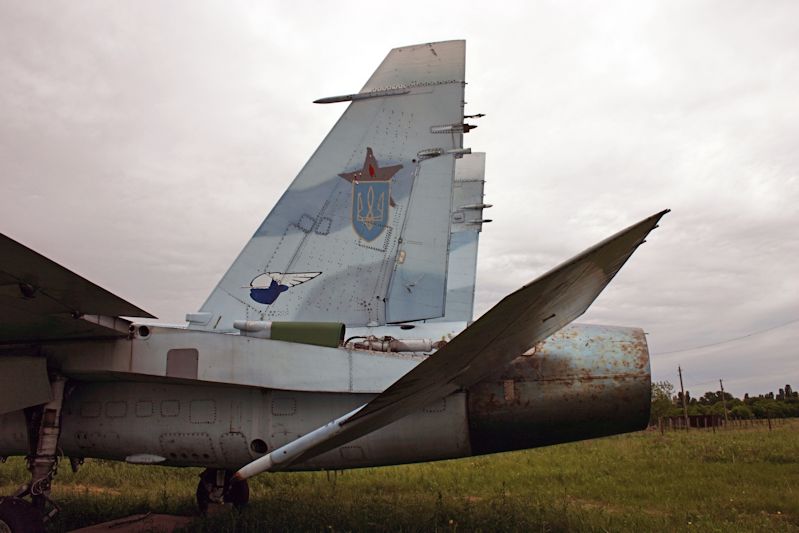
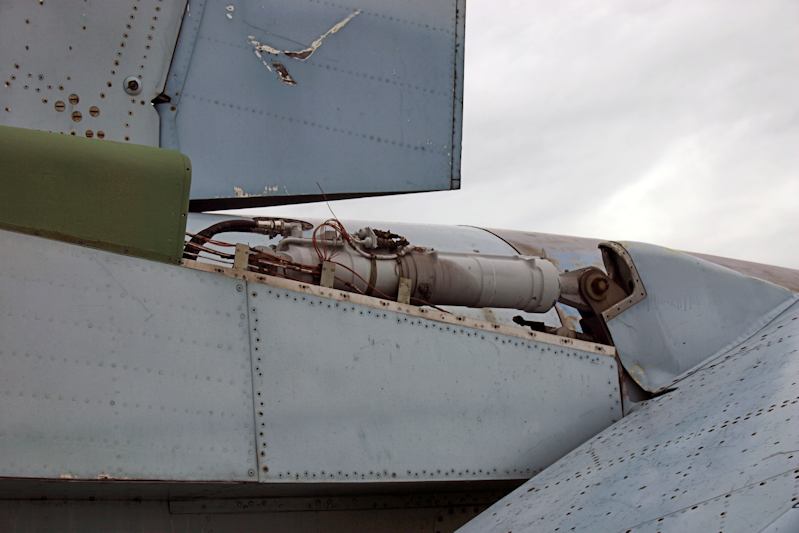
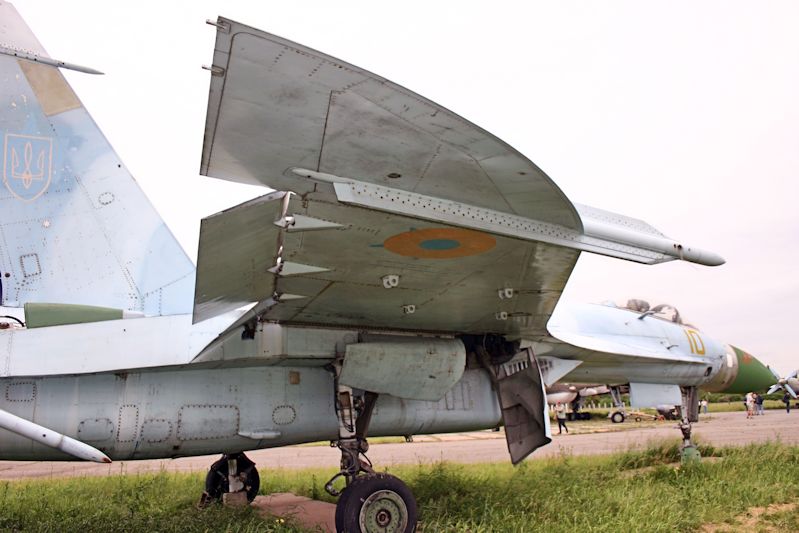
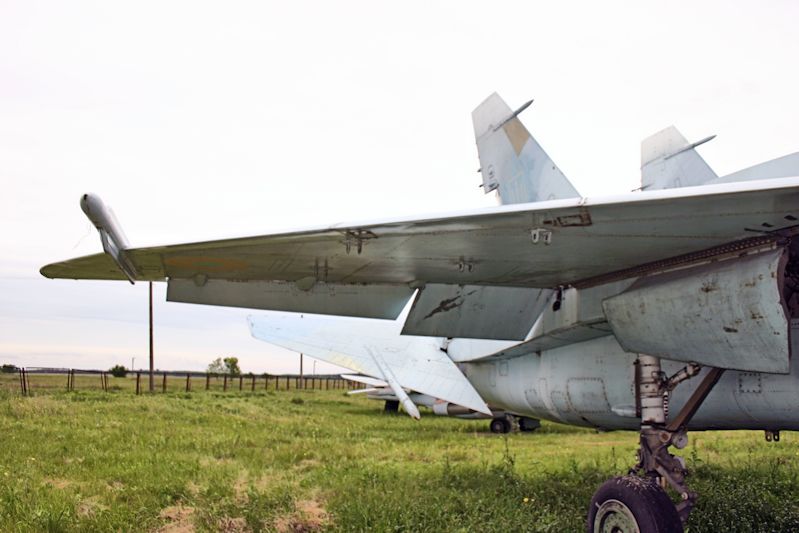
Port fin - note the Sukhoi 'Winged Archer' logo, the painted-out Russian star, Ukrainian logo and anti-flutter weight on the fin.
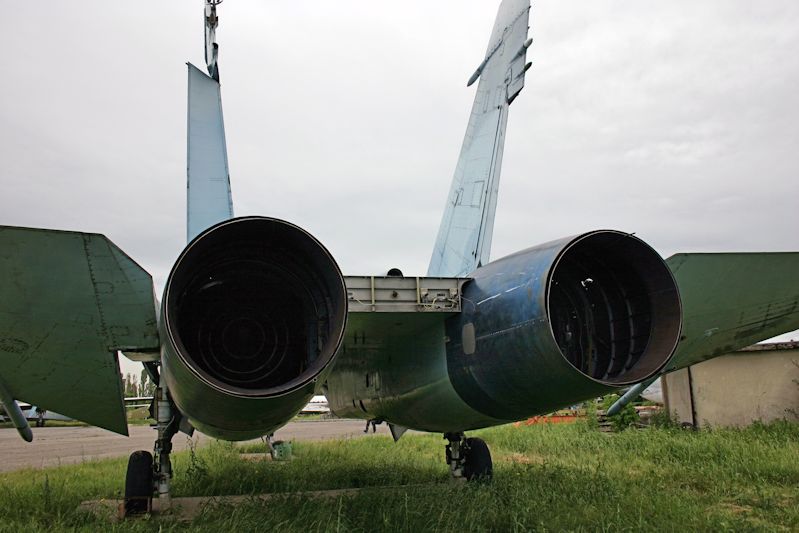
Note the missing 'Beaver Tail' and the blue colour on the jetpipe.
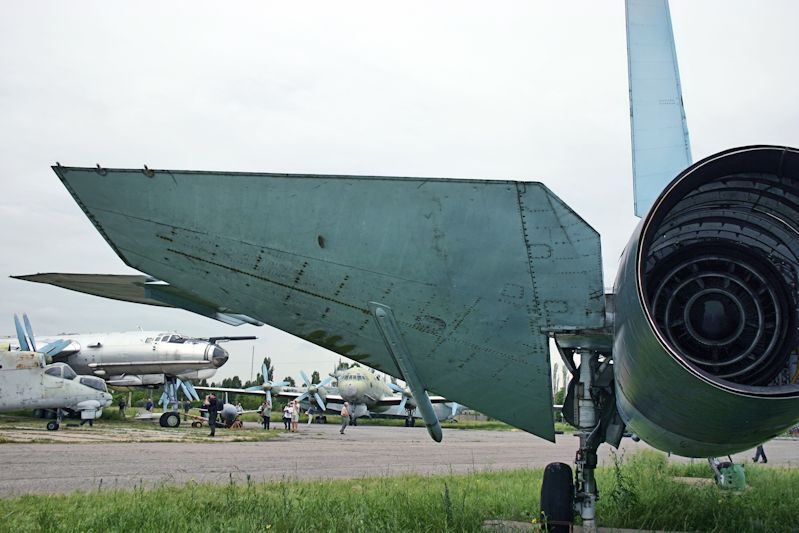
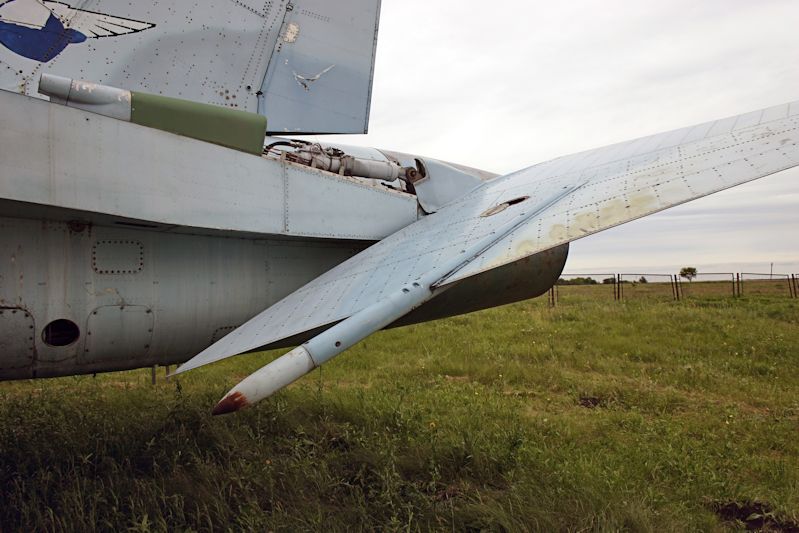
Port stabiliser/taileron.......
Starboard stabiliser/taileron...

Starboard rear fuselage.
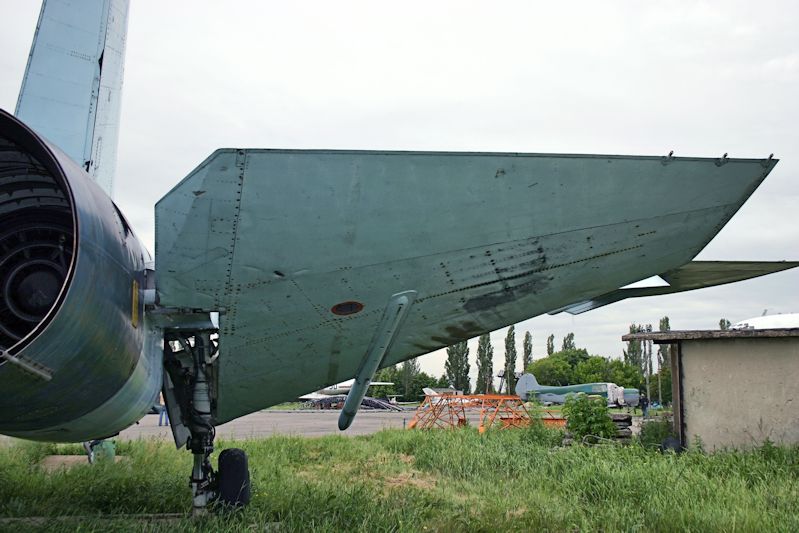
Starboard wing - note the massive anti-flutter weight and the lugs for the weapons pylons.
Starboard mainwheel bay.
Starboard intake - the front mainwheel door/airbrake is hanging vertically,
Starboard wing - note the separate flaps and ailerons on the prototypes.
Starboard nose - note the NM 'translation skirt' for the bigger radome on the later prototypess.
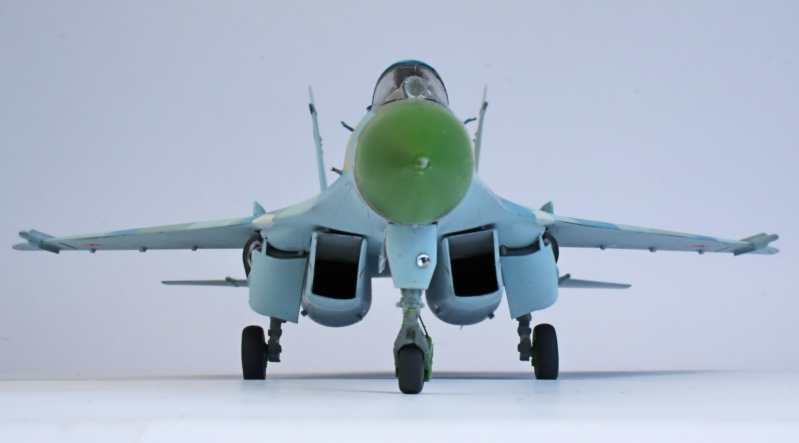
Frontal view - note the missing IRST ball in the front of the windscreen and the canted-out fins.
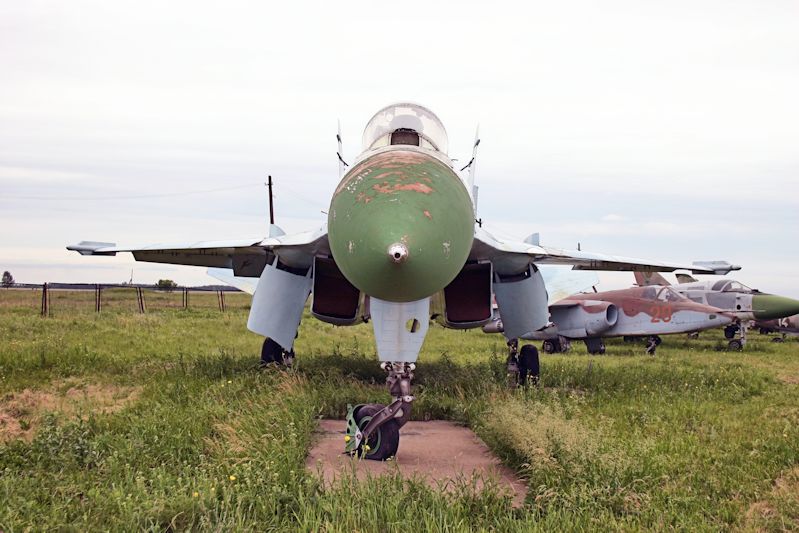
Front view - note the 'collapsed' starboard airbrake and missing landing light in the nosewheel door.
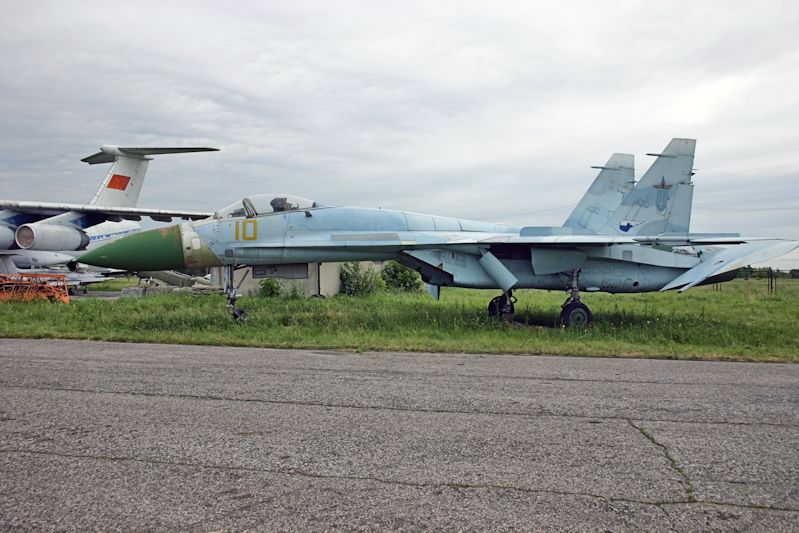
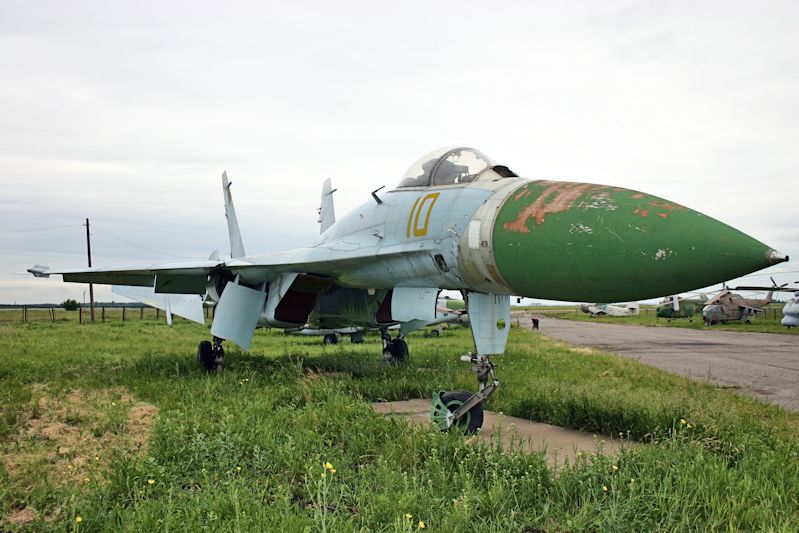
Tenth prototype T10-10 at the Lugansk museum.
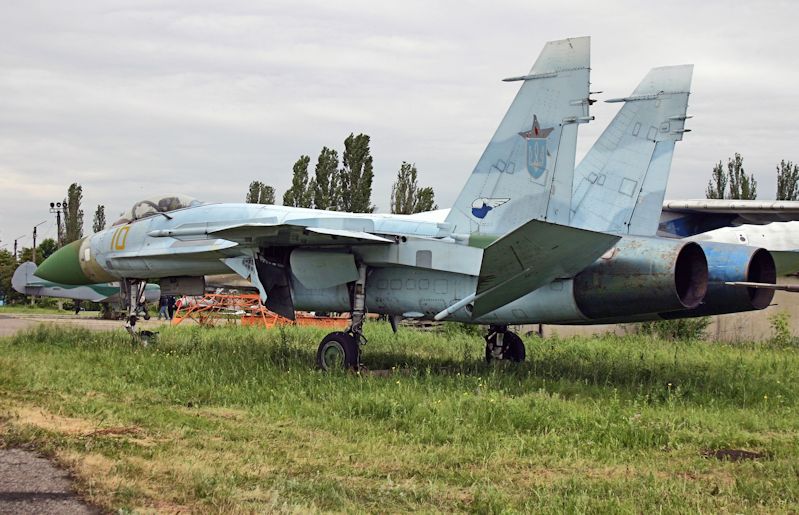
Note the blue colour on the jet nozzles.
Tenth protoype - with 'production' radome and canted fins.
First prototype at Monino - note the much slimmer radome and vertical fins.
Ken Duffey
Jan 2018