Amodel Il-76 'Candid'
Amodel's Il-76 'Candid' is the latest release in their 'Amonster' range.
This range has the major airframe component cast in fibreglass resin, with the other partsin 'normal' injection moulded plastic. This technique has allowed Amodel to produce some
very interesting models of the larger Russian types that would not normally be contemplated
by the mainstream model companies - or they would only be available as vacforms
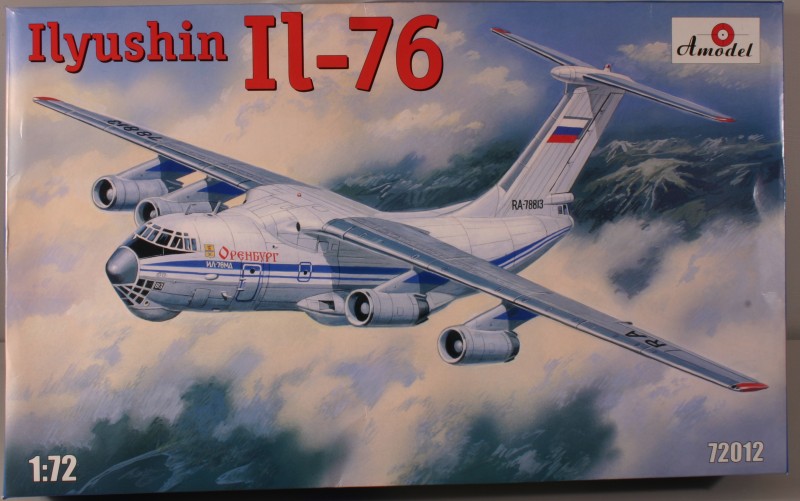
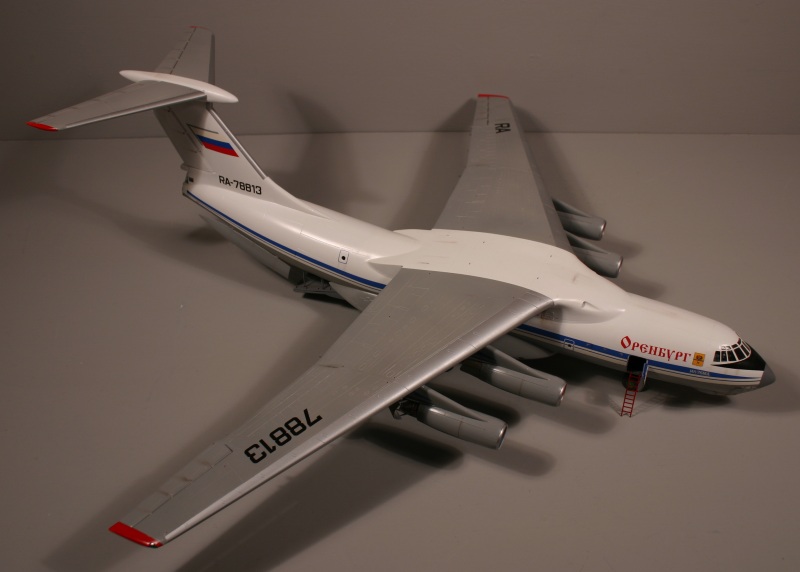
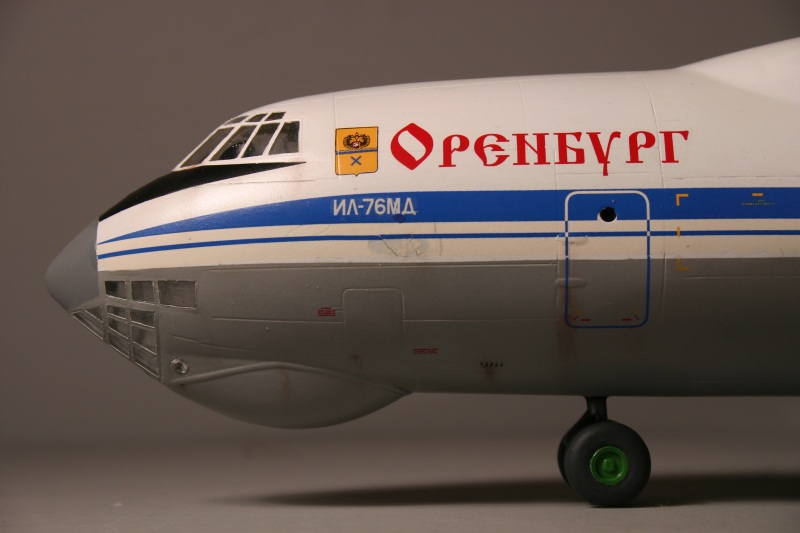
Amodel's boxart showing a military Il-76MD of the Russian Air Force Military Transport Aviation (VTA)
These machines are now being given city names - this one is Orenburg.
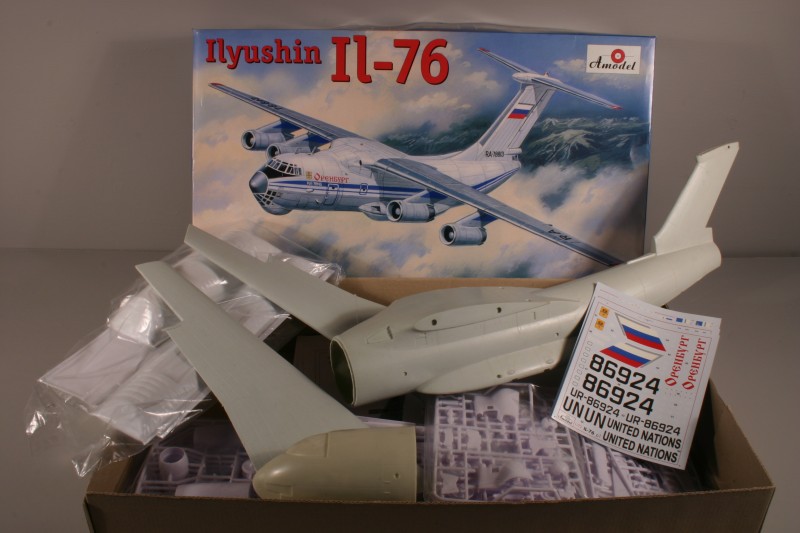
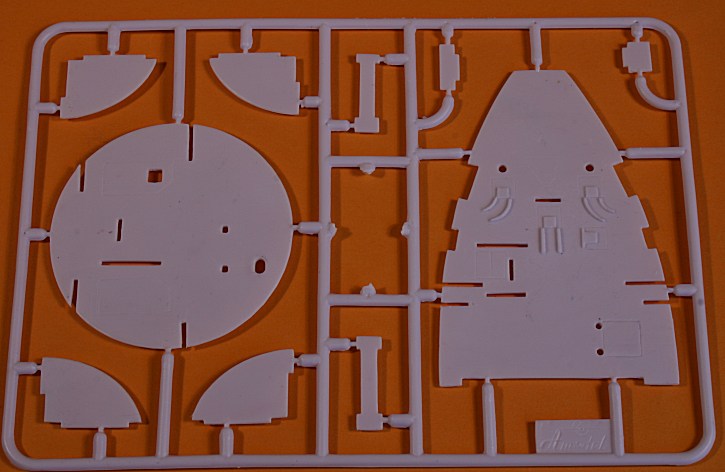
Box conents.
Fibreglass resin parts are all pre-assembled and comprise the hollow fuselage with separate nose, one-piece tailplane
and wings. The breakdown of parts indicates that Amodel are planning Il-78 Midas tanker & A-50 Mainstay AWACS version.
Another view of the fibreglass resin fuselage with the tailplane and nose temporarily tacked in place
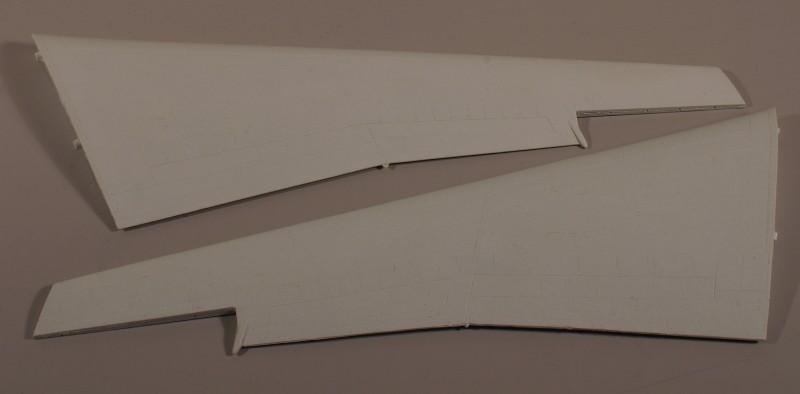
Solid, one-piece wings
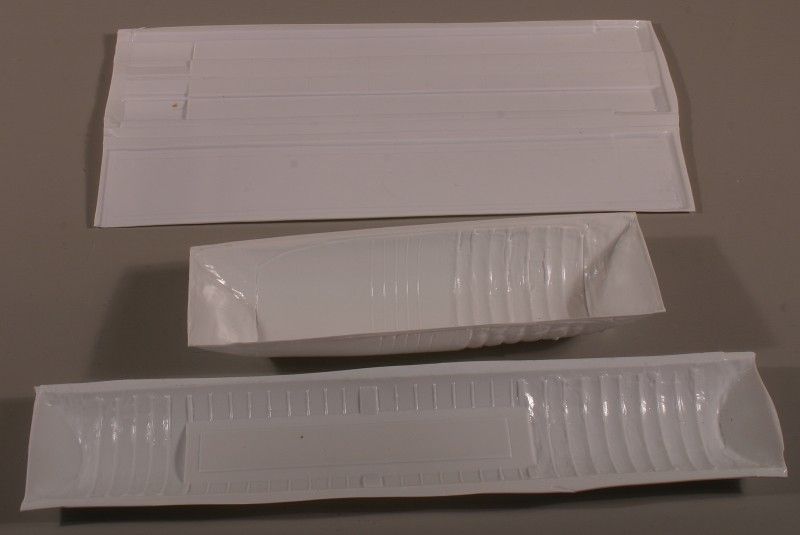
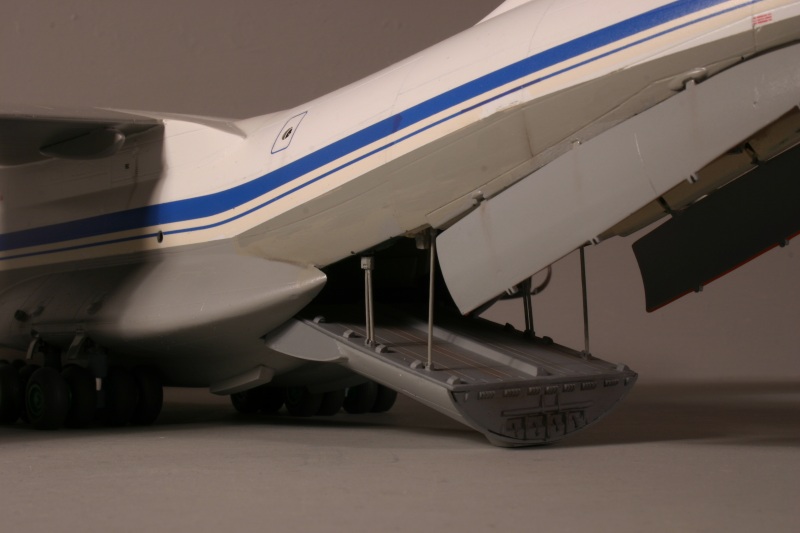
A fully-detailed interior is provided in the form of vacform floor, side panels and roof.
The middle component goes inside the upper rear ramp area.
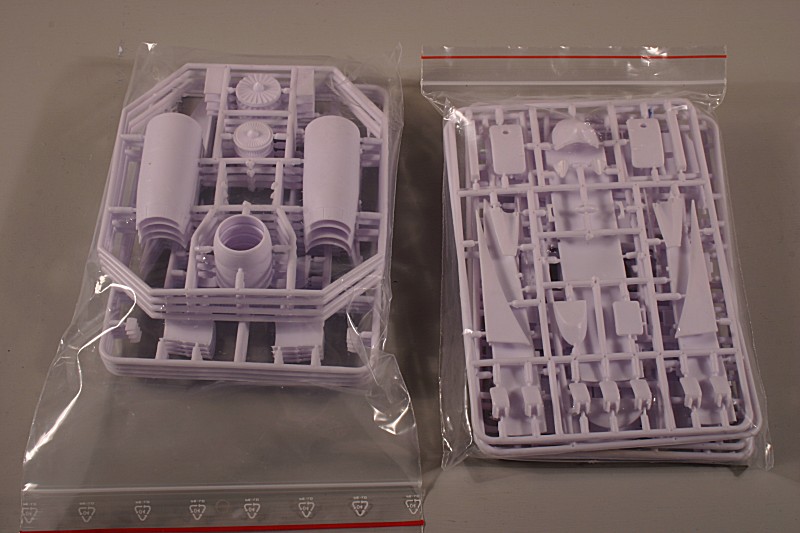
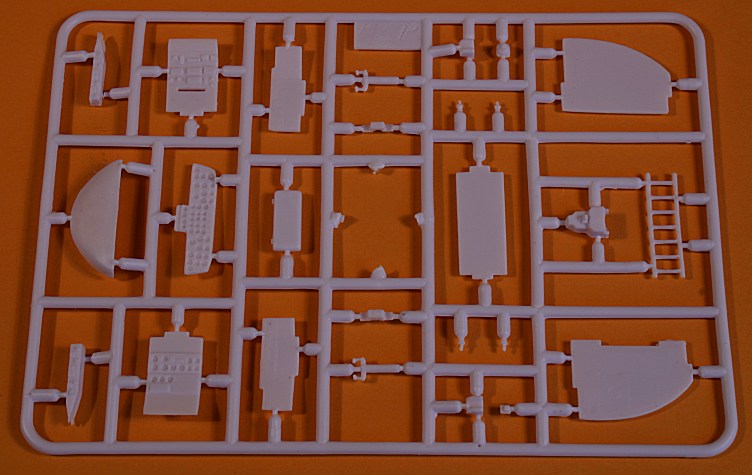
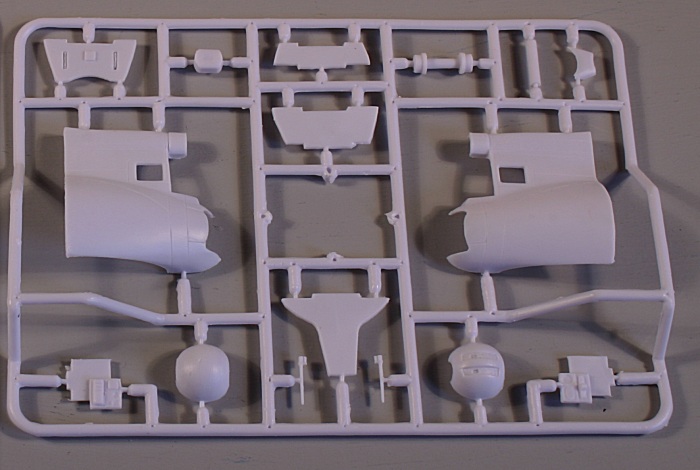
All the injection-moulded components are delivered in zip-lok bags - six bags of them!
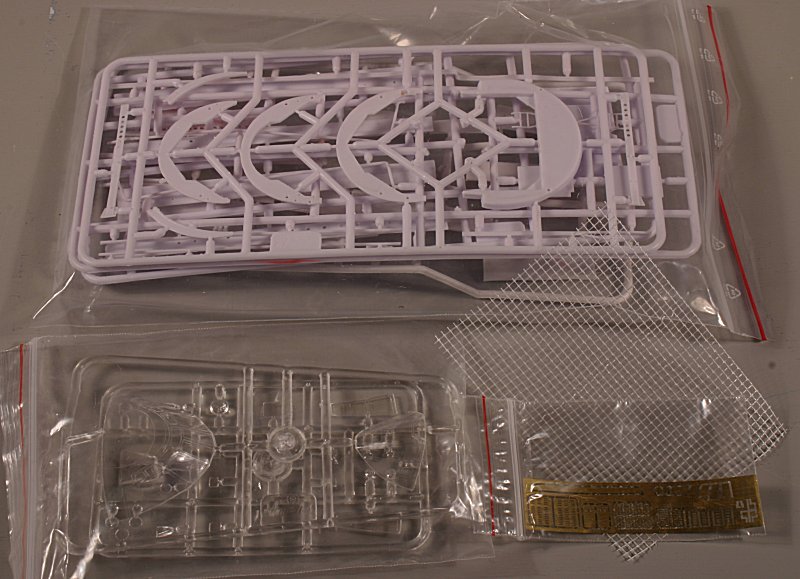
This shot shows some of the interior components at top, then the clear sprue, the etch-brass parts - and a sheet of mesh
for the inside of the rear ramp area - all very comprehensive.
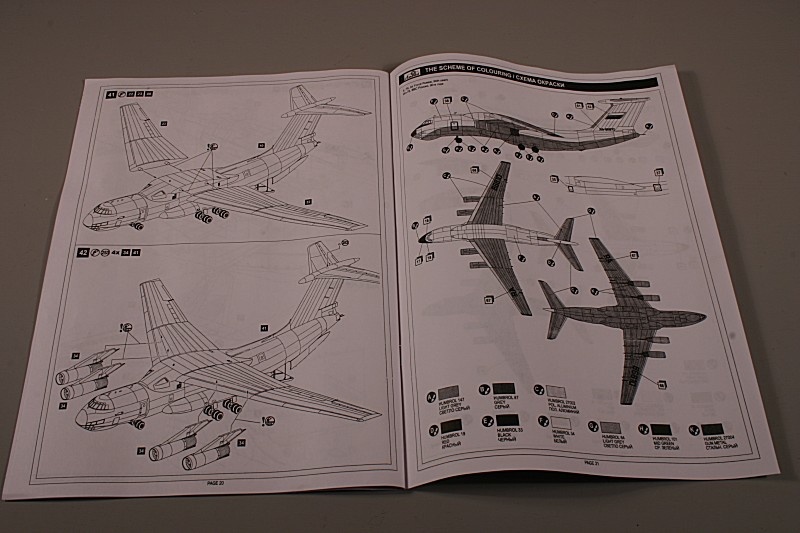
The 24-page instruction 'manual' is very comprehensive and quotes Humbrol paint numbers.
There are also two A3-size sheets giving colour scheme details for the three versions included.
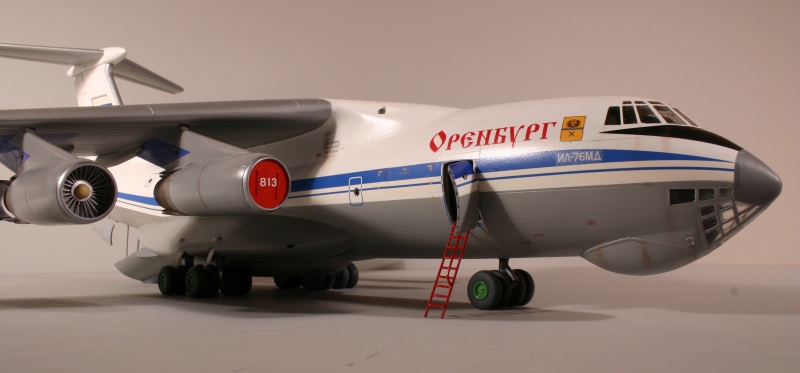
An all-white fuselage Ukrainian-registered UN example, a white-and-grey plain-looking Russian AF example and
the one on the box - 'Orenburg' in Aeroflot-style colours
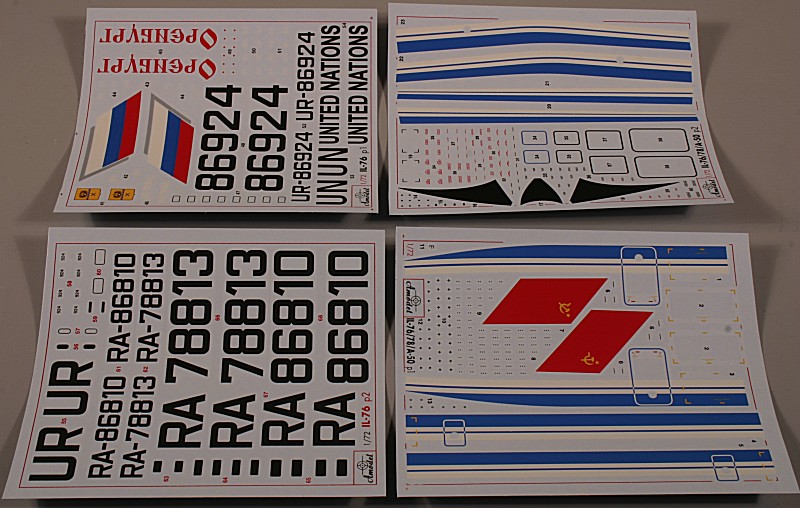
The four 'mini' decal sheets look well printed and in register and include lots of stencil data.
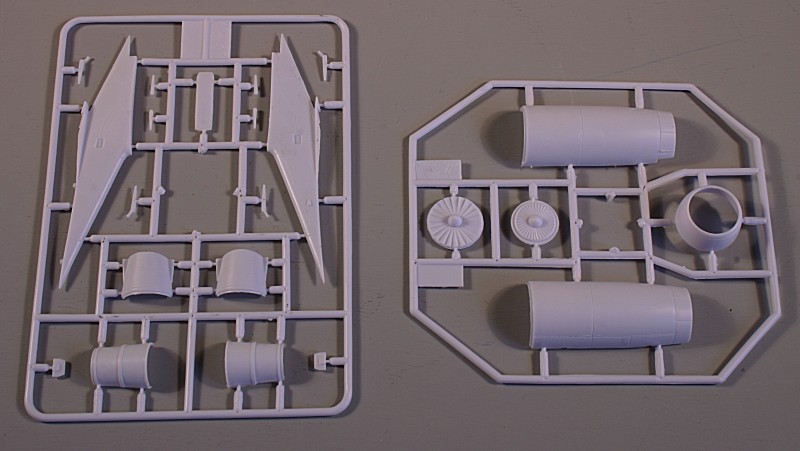
A closeup of some of the injection-moulded parts - excellent detail and flash-free.
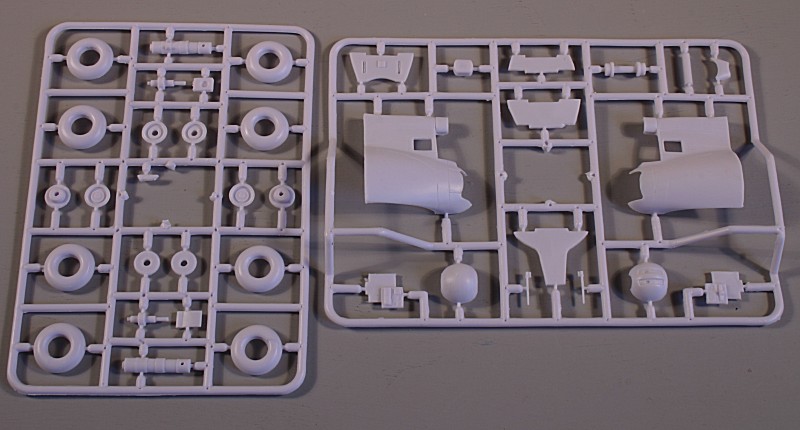
Another sprue shot - showing the tail gunners station on the Il-76 variant.
Although it is fibreglass resin, the panel detail is excellent.
This view shows the rough interior of the fibreglass resin fuselage - which will be hidden by the vacform parts.
In this latest release, Amodel seem to have used less fibre and more resin - making it almost like a pure resin kit.
Closeup of the nose............
....... which I think looks better upside down <g>.
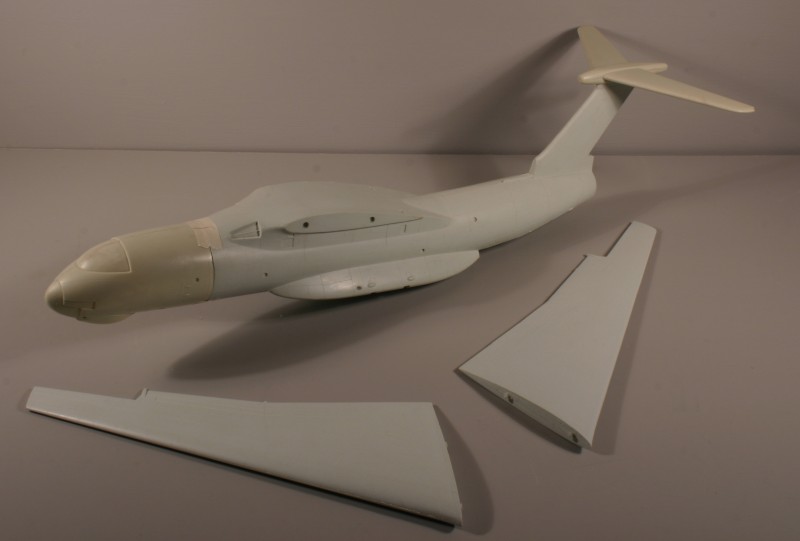
I have now made a start on construction....
These are the sprues for the very well detailed cockpit....

As you can see the complete cockpit is provided - including the lower navigators station,
all the side instrument consoles and rear cabin bulkhead.
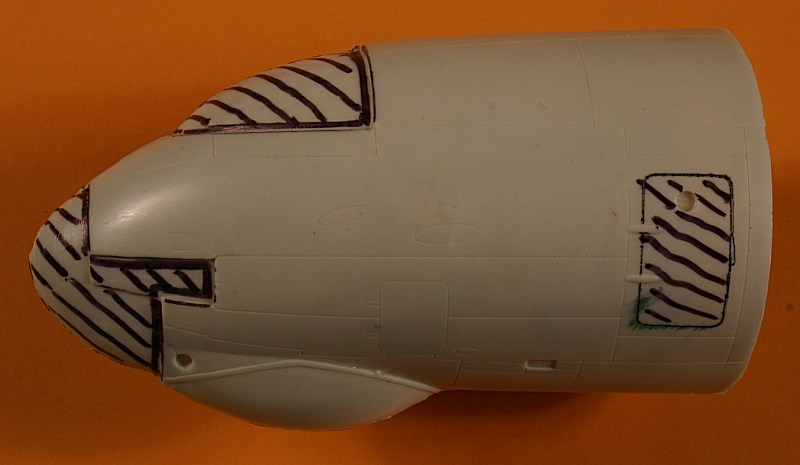
Before working on the cockpit, you have to remove the hatched sections from the fibreglass resin front fuselage.
You can also open both doors that lead into the front of the cargo compartment - plus the crew access door just above the radome.
Amodel provide these doors as injection-moulded parts should you wish to open them up. As most photos of parked
Il-76's show only the starboard door open I am going to model it thus.
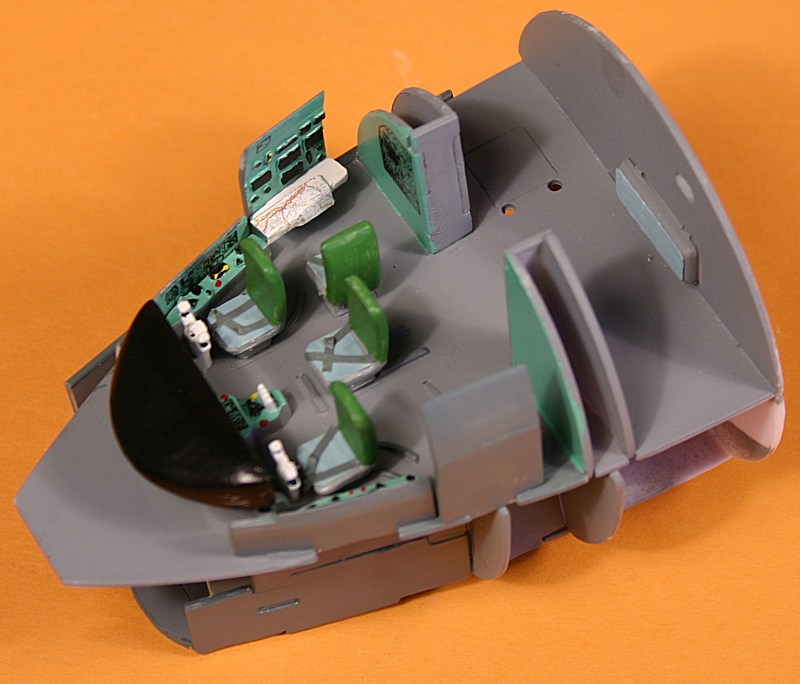
Here is the pilots cockpit assembled. It is very comprehensive - the only things I have added are four throttle levers,
seat belts and the navigators map! (actually I have just realised that this is the flight engineers station!) Doh!
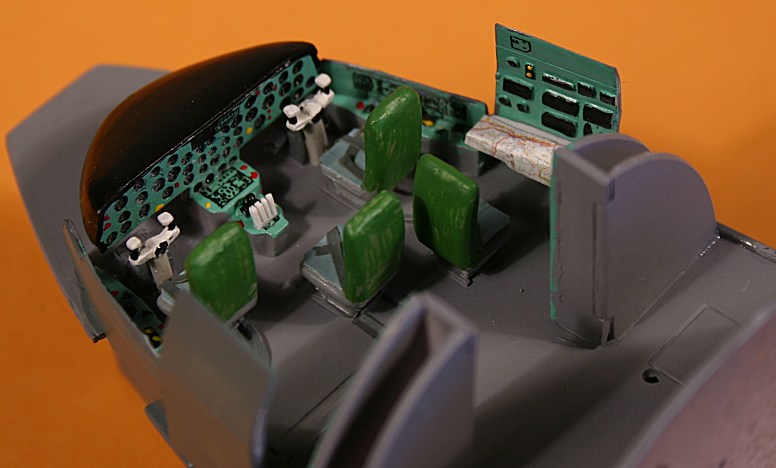
Another view of the finished cockpit - the instruments are just hand painted with the addition of a few decals
from the spares box. Not much of this can be seen with the cockpit glazing in place, so superdetailing is just a waste of time.
This is looking into the lower deck - where the real navigator sits. Again you can't see much of this with the glazing in place.
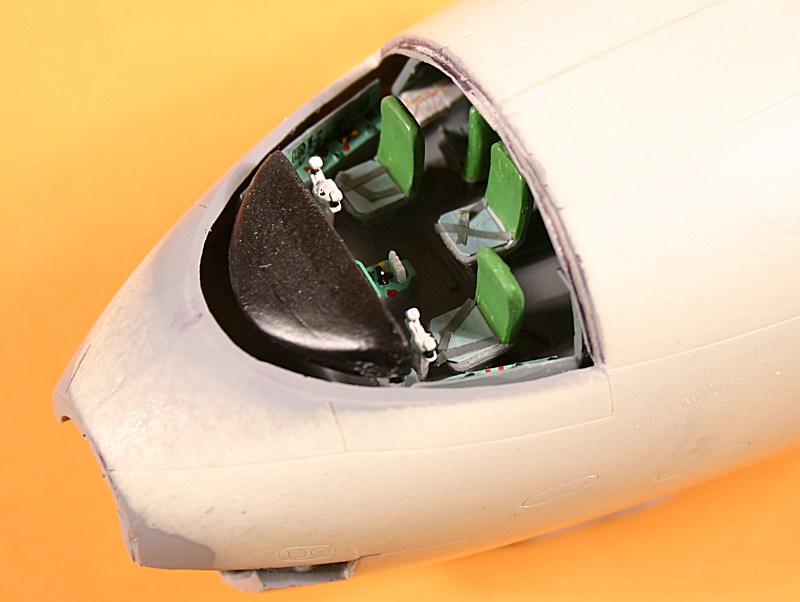
The pre-assembled cockpit then has to be 'worked' into the fibreglass resin front fuselage - and it is a tight fit.
I had the remove some resin from the rough insides of the fuselage to get a decent fit - but it went in eventually.
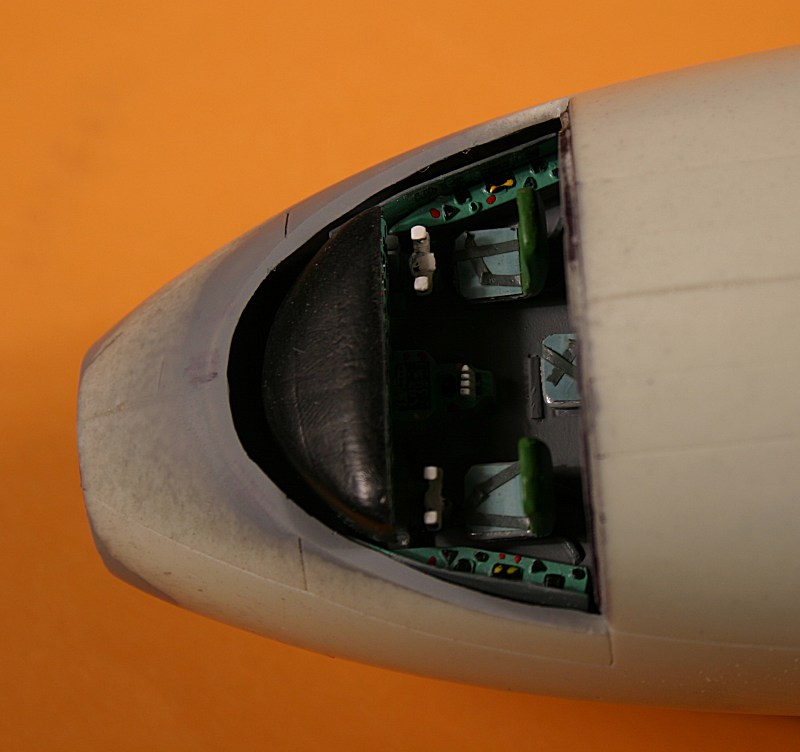
The injection-moulded cockpit could probably do with being a few millimetres further forward - but I didn't want to
force it too much and I had removed as much material from the inside as I dared.
It looks OK with the cockpit glazing held in place temporarily - and the upper glazing fits perfectly!
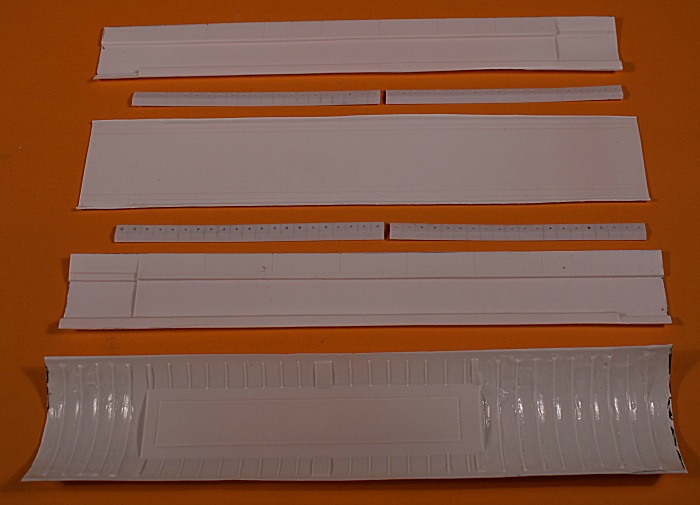
These are the parts for the detailed interior - from the top, the starboard side wall, a row of injection moulded
folded seats, the vacform floor, another row of seats, port side wall and roof.
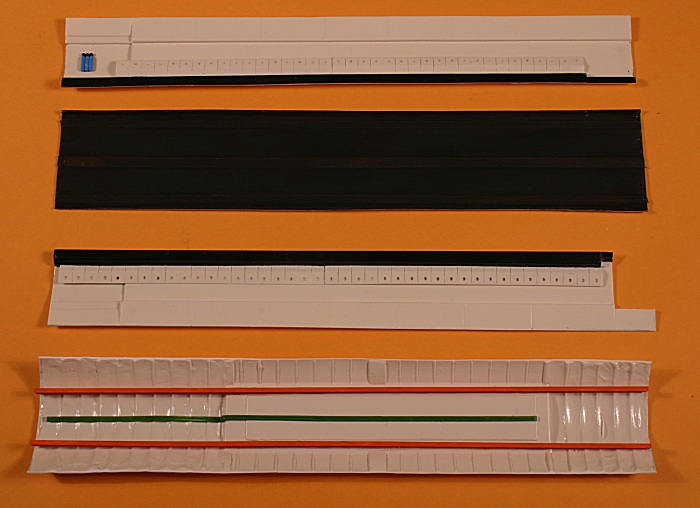
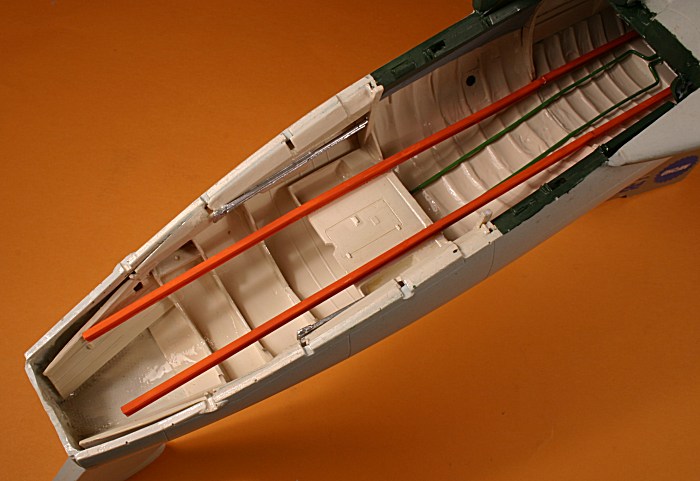
The same components painted - the main interior colour on the Il-76 appears to be cream.
Amodel supply some great detail- like the green ducting on the roof, but oddly, they have not included
the prominent rails for the travelling crane. I added two I-section Plastruct beams, painted orange.
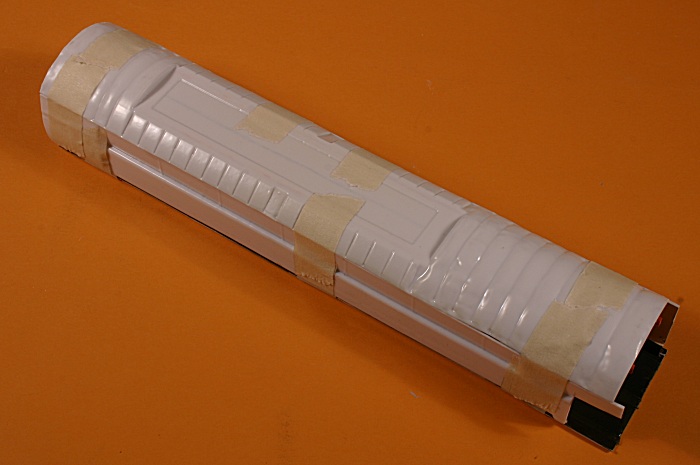
The completed interior - glued and taped together..........
....and partially slid inside the fuselage. I had to fiddle around a bit to get it in - removing bits of rough
fibreglass from the insides until it slid all the way in. I have also cut away a section from the
starboard side panel - because that's where the open crew access door is.
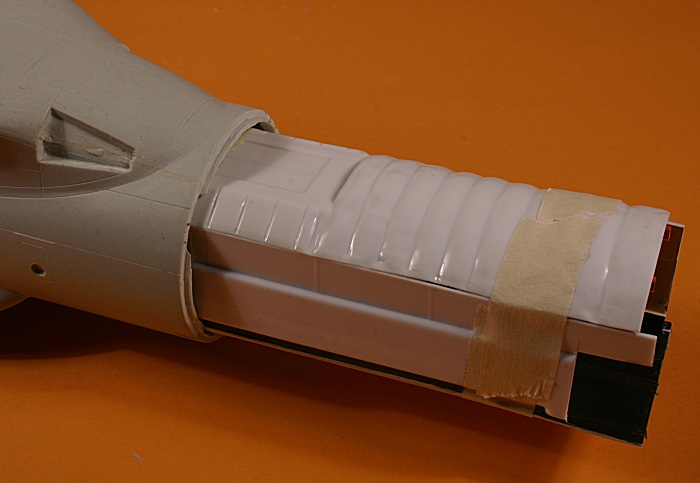
This shot is looking up inside the fuselage from the rear - the interior just needs bedding down where
it meets the ramp. You can see the injection-moulded folded seating and the orange rails.
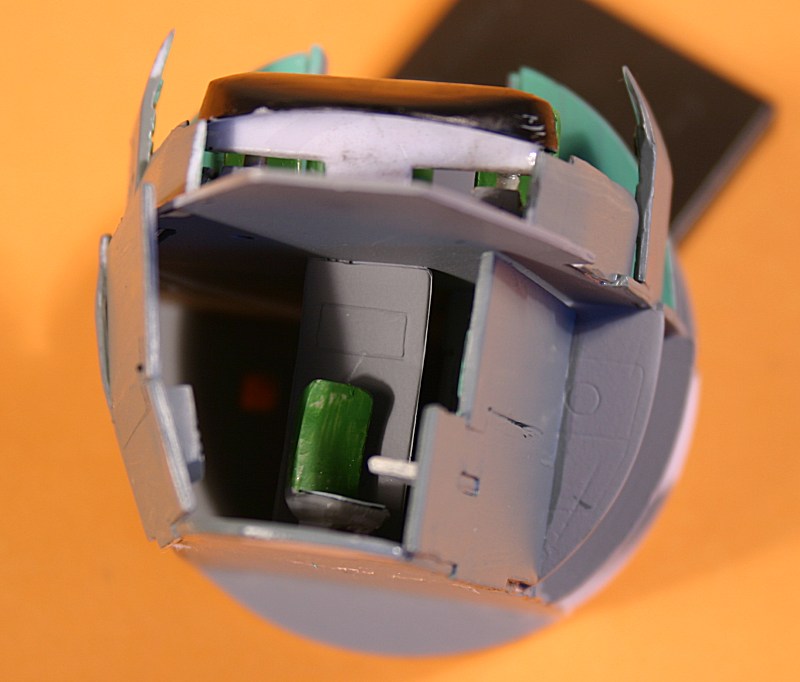
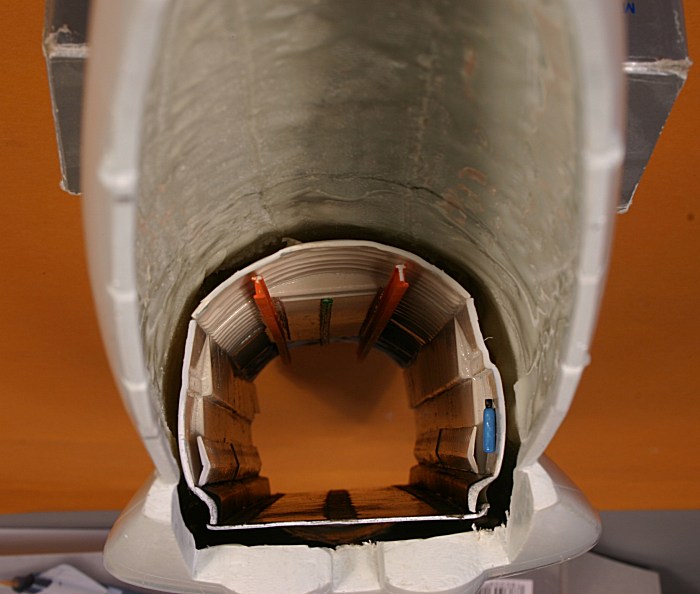
The interior up inside the tail section has a vacform 'roof' and very well detailed interior structure made
up from side panels, four horseshoe-shaped 'hoops' and a retracted pressure bulkhead - very comprehensive.
Amodel's instructions would have you assemble all this first and then insert it into the fuselage.....but.......
.....whoever wrote the instructions hasn't made the model - because the assembled structure simply will not
fit into the fuselage - the opening at the bottom of the fuselage is narrower than the 'roof'!
The only way to do it is to ignore the instruction sheet - and assemble the parts in situ.
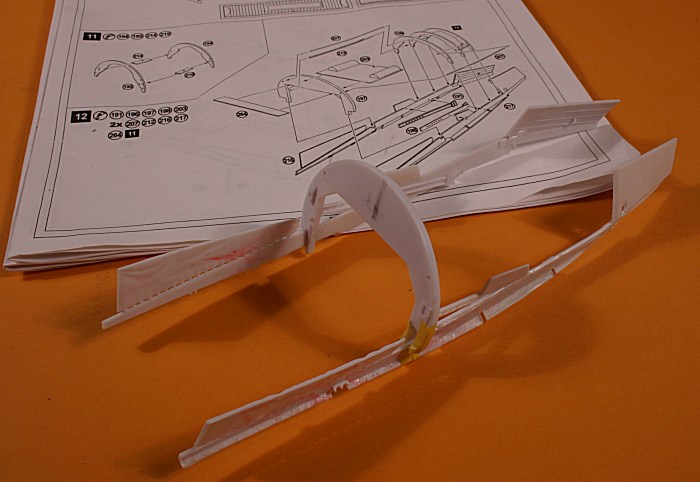
...so the first thing to do is put the vacform roof into place.
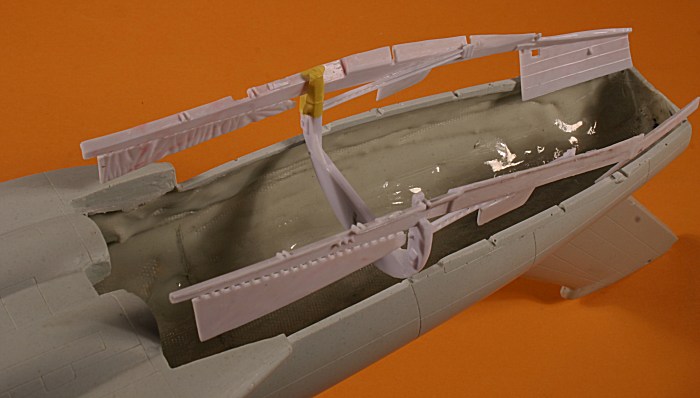
...then add the side panels, 'hoops', pressure bukhead etc. I had to trim a few parts to fit, but in the end
it all went into place. The crane rails go all the way up to tail - so they were added to this section as well -
although I think I may have made them too big - smaller I-sections would have been better.
With the inward-opening central door and the side doors in place, most of this won't be seen anyway.
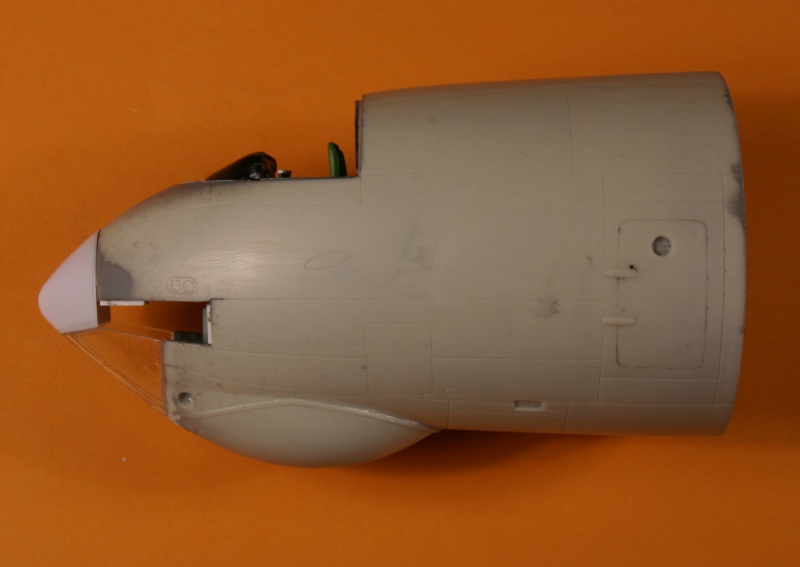
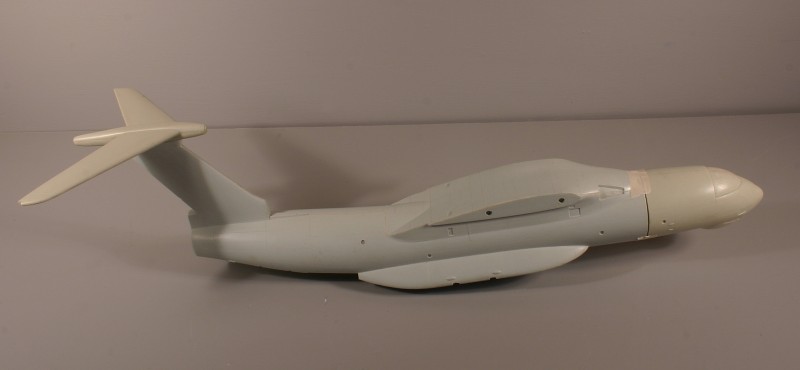
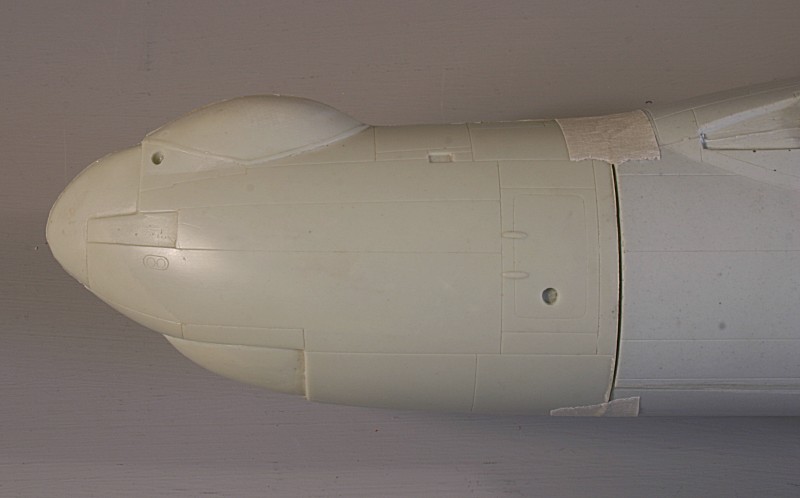
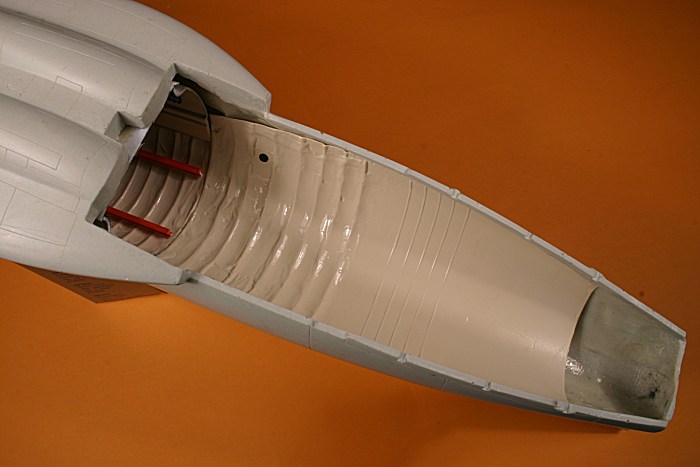
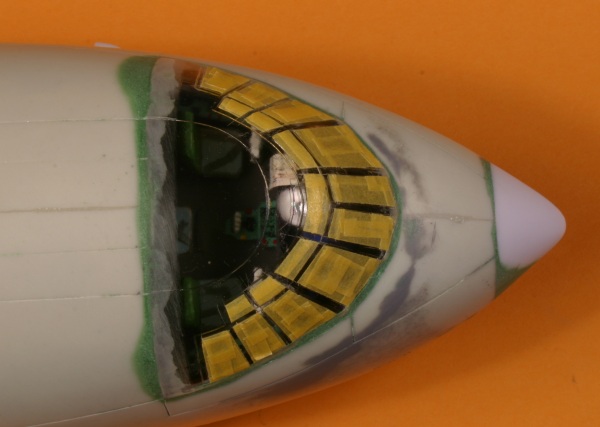
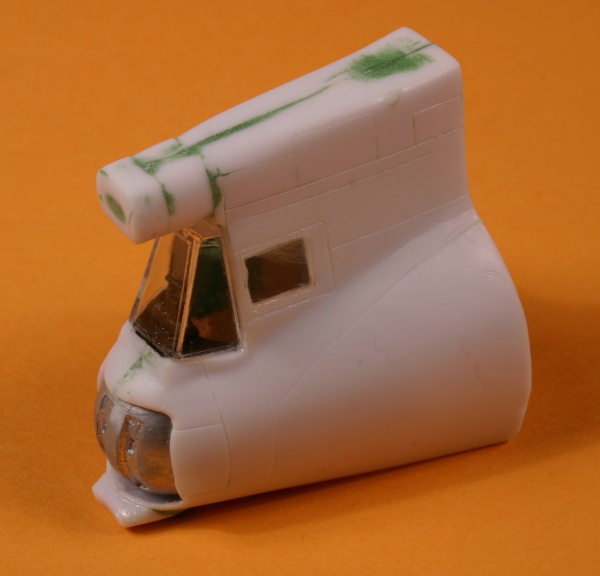
I have added the injection-moulded nosecone in place - to act as a reference point for the lower nose glazing - also added.
The 'side windows' are separate - I have added small ledges from plastic card to prevent them falling inside.
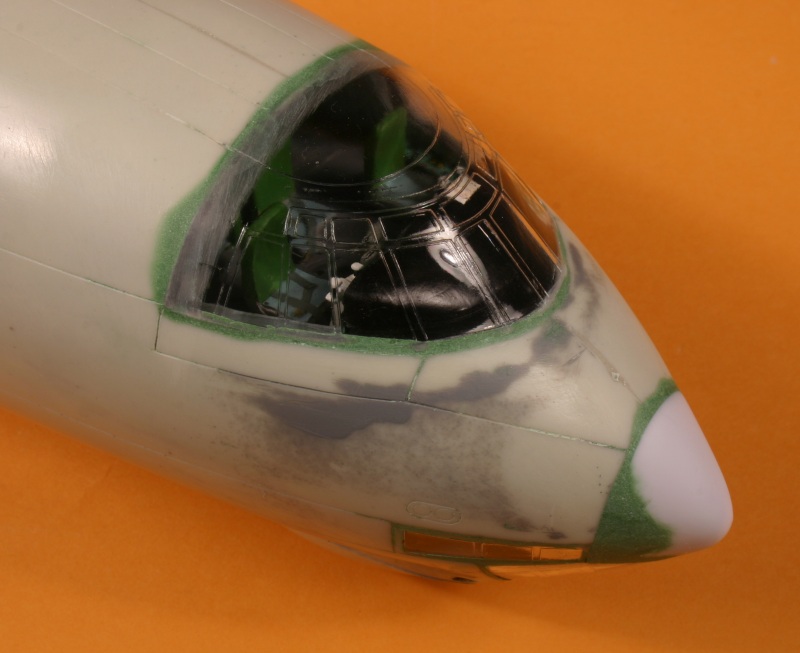
The side windows and canopy are added - and blended in with filler. It is very important to make the glazing
part of the aircraft structure without any join lines. When a coat of white primer was sprayed on it showed up
a number of flaws in this first 'blending' - so more filler was added until I was satisfied. Note also the mismatch in the
shape of the nose radome - again blended in with filler.
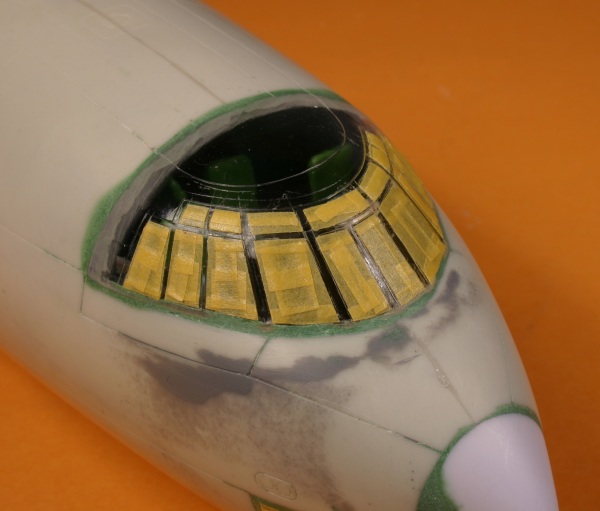
Then came the task of masking all the windows - I don't expect Eduard will oblige on this one!
The canopy was quite a good fit - at least it was until the primer coat was applied!

All the masking in place.......
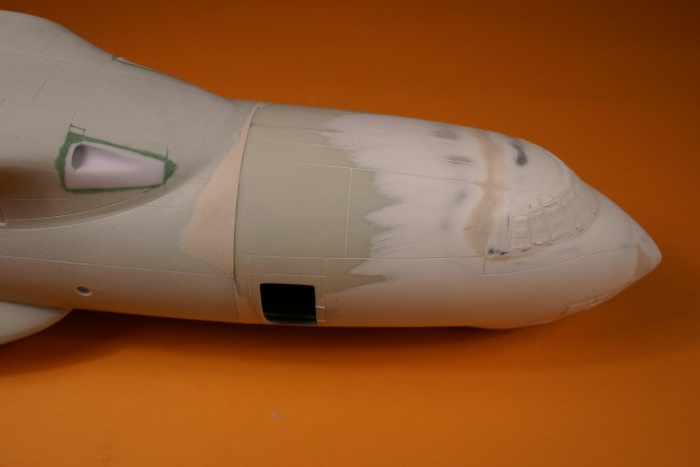
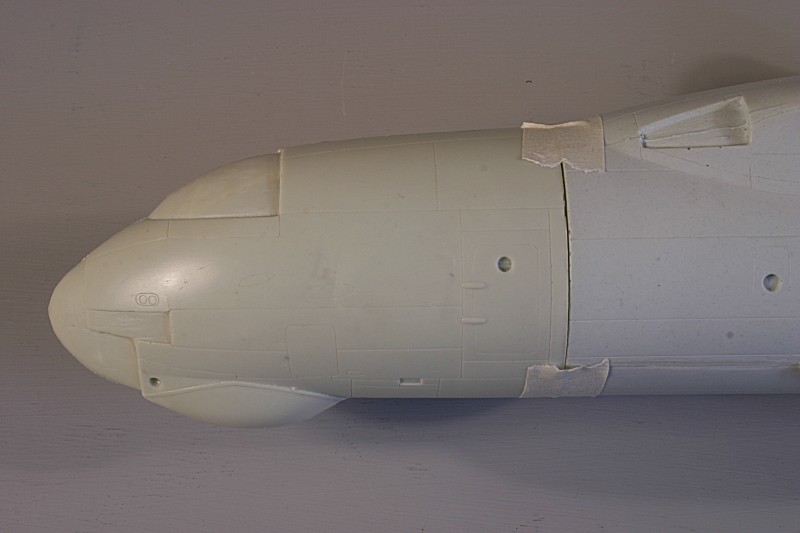
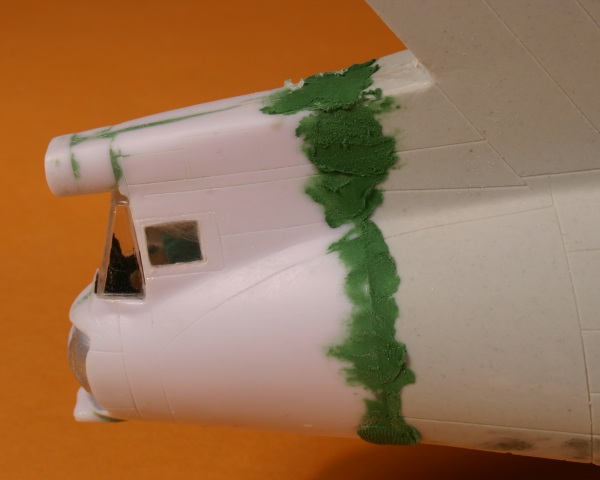
Here the whole nose assembly is added to the main fuselage - and there is a slight mismatch in contours
which has to be taken care of with more filler. Note also the white filler around the rear of the cockpit
canopy and again on the nosecone. It took quite a lot of filling & sanding to get 'invisible' joints in both places.
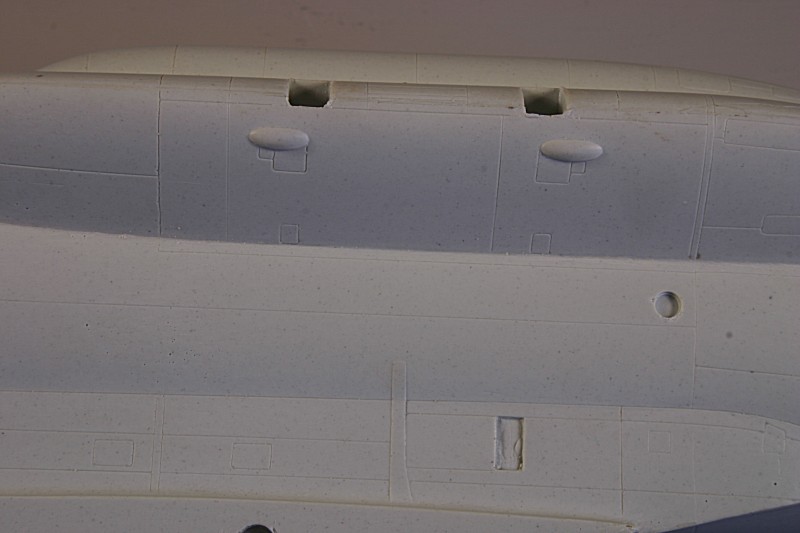
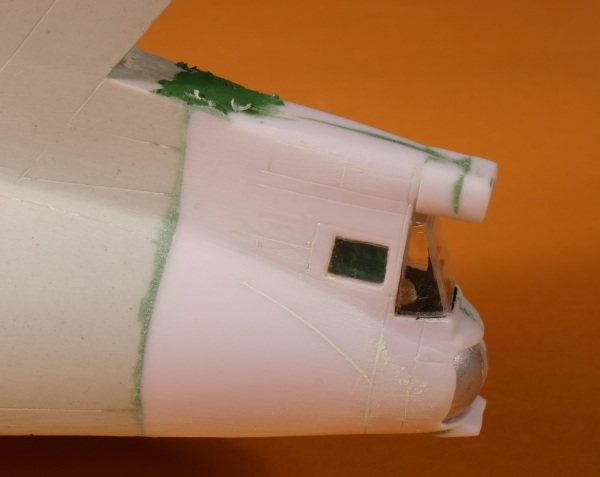
The intakes in the wing/fuselage fairing are injection-moulded - and again need to be faired in.
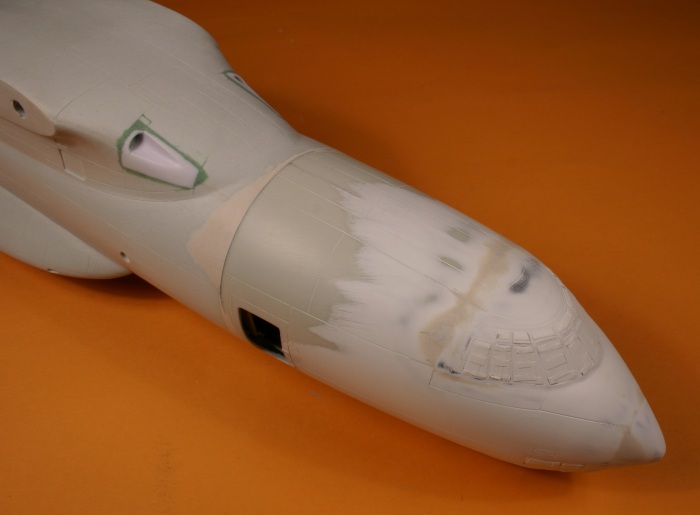
Another view showing the amount of filling/sanding to get a smooth, jointless finish.
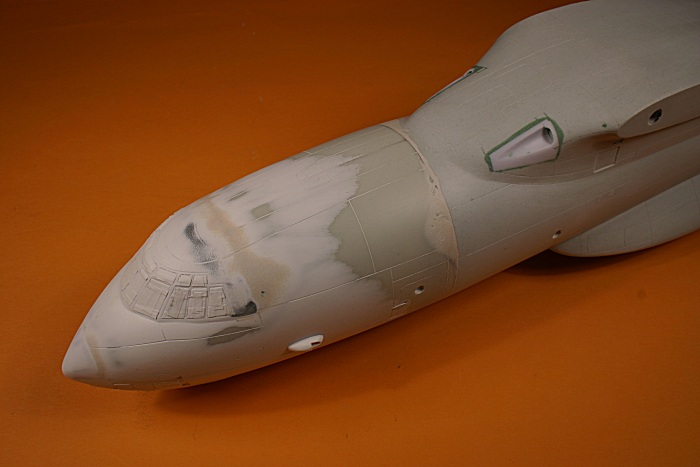
Note how the filler at the front/rear fuselage joint needs some more adding...
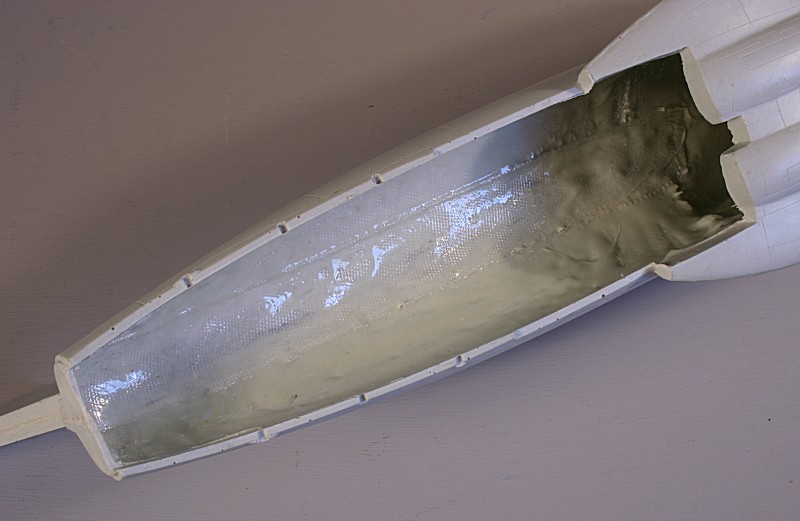
The rear gunners compartment is made up from these parts - which don't fit all that well!
The assembled rear end.....
.... which also needs to be faired into the fibreglass resin fuselage.
Filled and sanded.
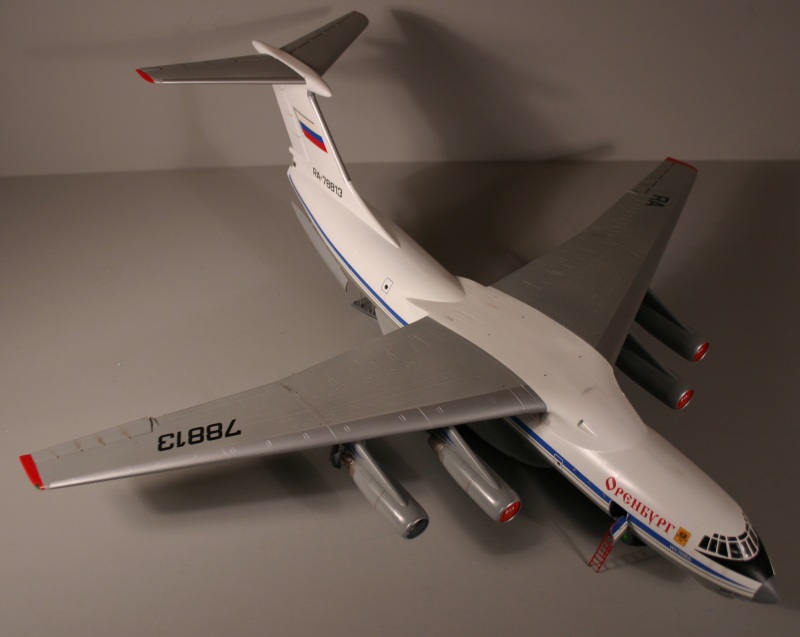
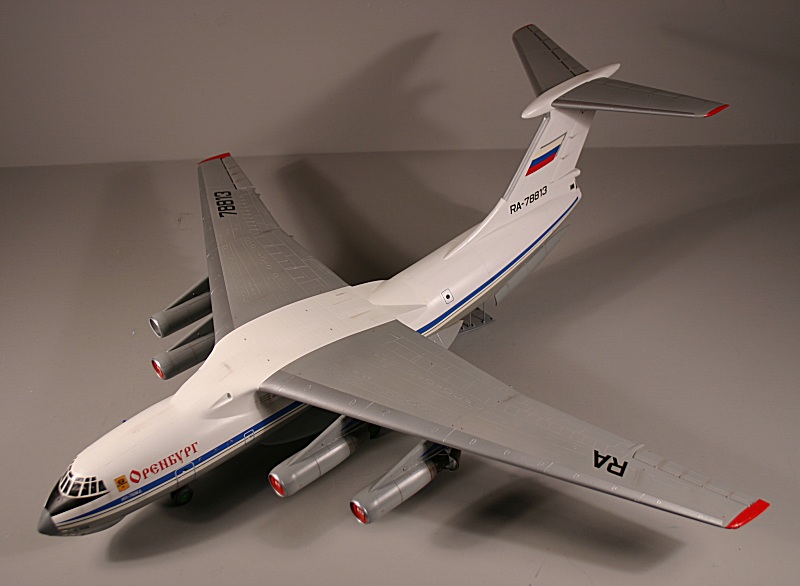
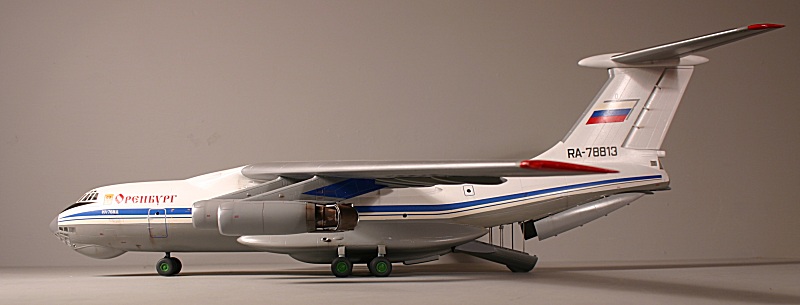
Finished Model
Amodel A-50 Mainstay
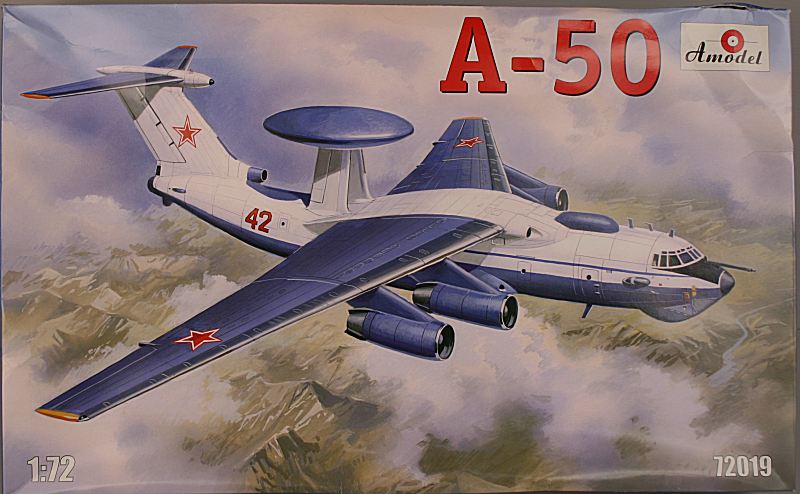
Amodel A-50 boxart.
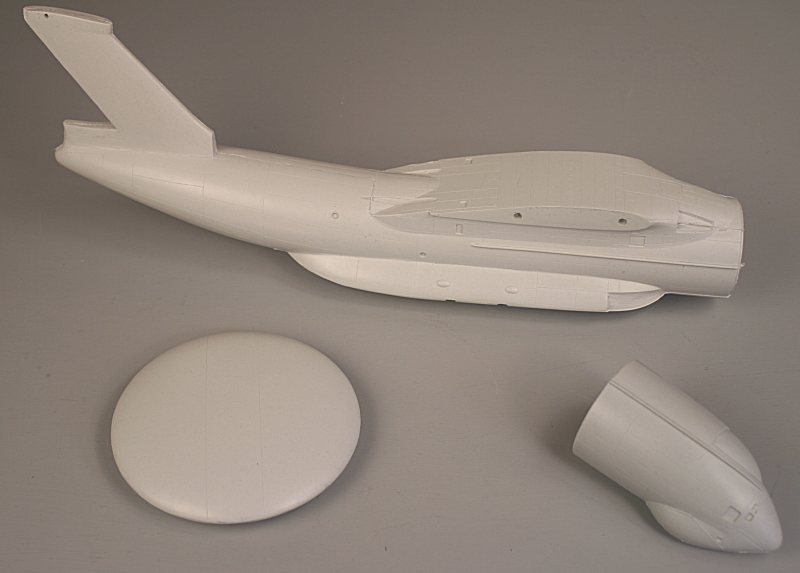
The kit contains a completely new fuselage - with sealed cargo ramp doors - plus a different nose with the
refuelling probe duct along the starboard side. In addition, there is a fibreglass/resin rotodome.
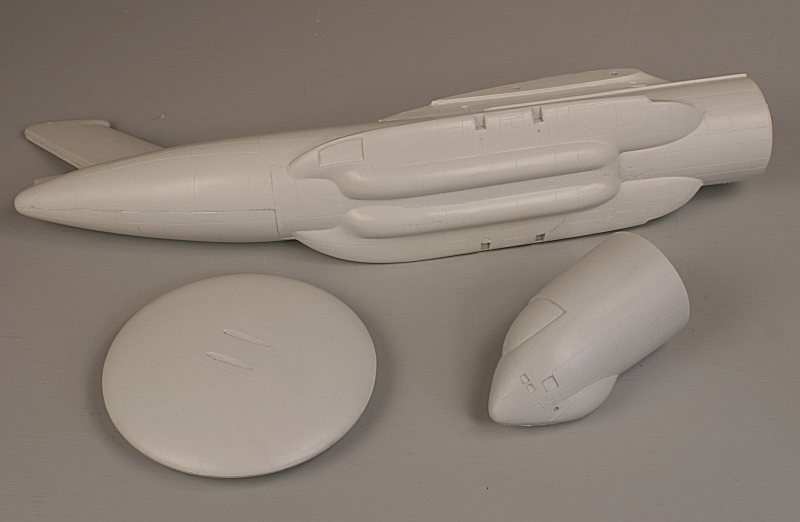
Another shot of the new fuselage moulding showing the underside.
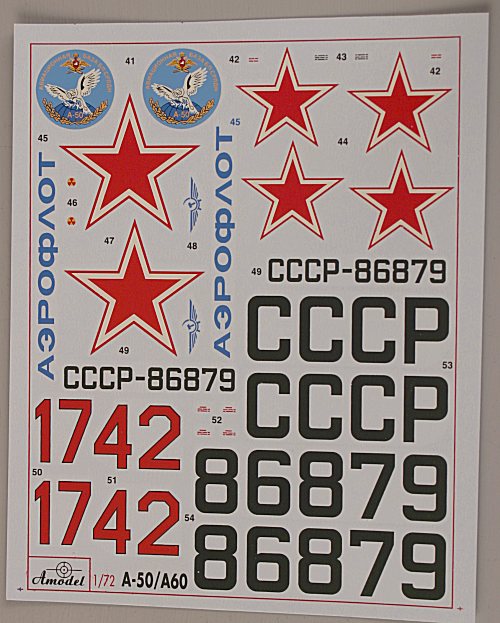
An additional decal sheet is included giving options for two A-50's
Red 17 or Red 42 - plus the 'Owl' badge sported by some A-50's based at Ivanovo-Severnyy AB
Copyright
Ken Duffey
November 2006